Abstraction of Street Life
Stephen Calcutt
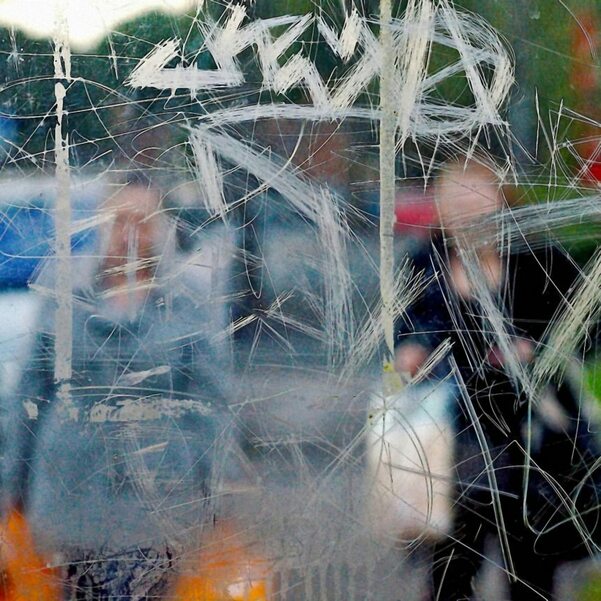
Stephen Calcutt based his Bus Stop abstraction photography from frequently using the bus stops around the city of Birmingham. He focused on not just capturing any type of graffiti but rather the scratches on the bus stop windows. He felt as if the scratches were a violation instead of a work of art but used the scratches as a focus point to distort and blur the rest of the image so what was in front of the bus stop was not visible and only the scratches were in full focus.
Stephen Calcutt work inspired me as it showed me as a photographer that you can take any ordinary item, object or place and turn it into an effective piece of work. For example his work below is something you see on a day to day basis, but he has taken it and singled it out while using ordinary people holding shopping bags behind it which emphasizes how any thing in the world can be effective, it just matters on your perspective.
Stephen Calcutt work inspired me as it showed me as a photographer that you can take any ordinary item, object or place and turn it into an effective piece of work. For example his work below is something you see on a day to day basis, but he has taken it and singled it out while using ordinary people holding shopping bags behind it which emphasizes how any thing in the world can be effective, it just matters on your perspective.
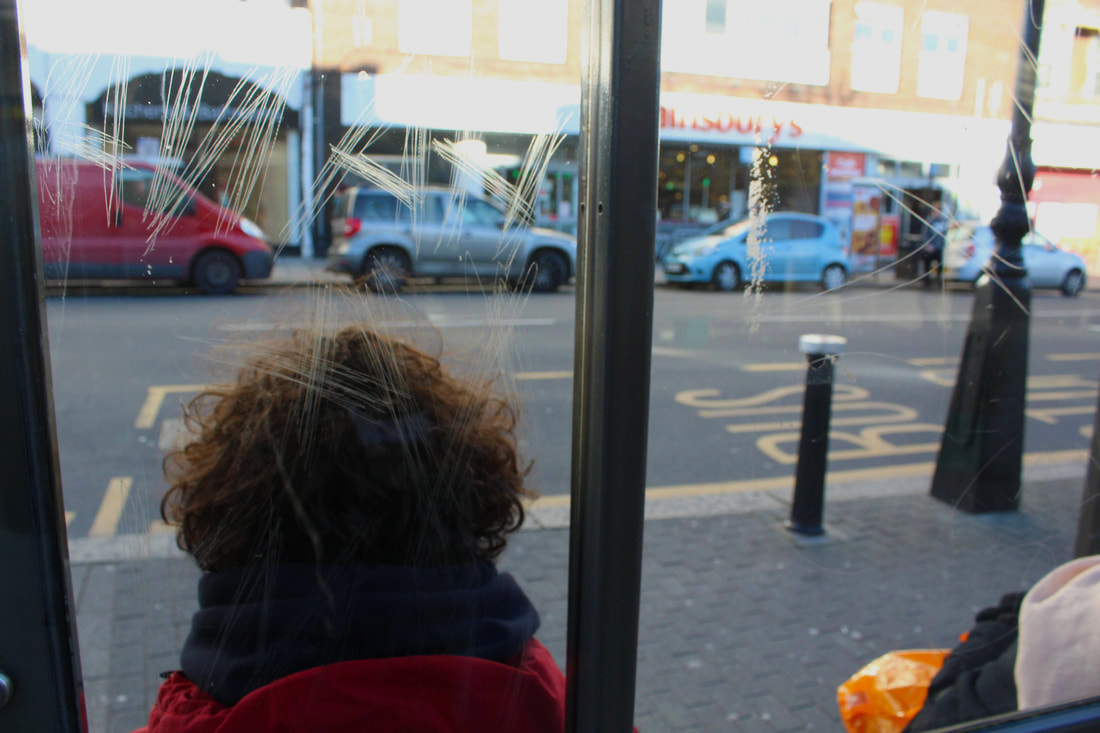
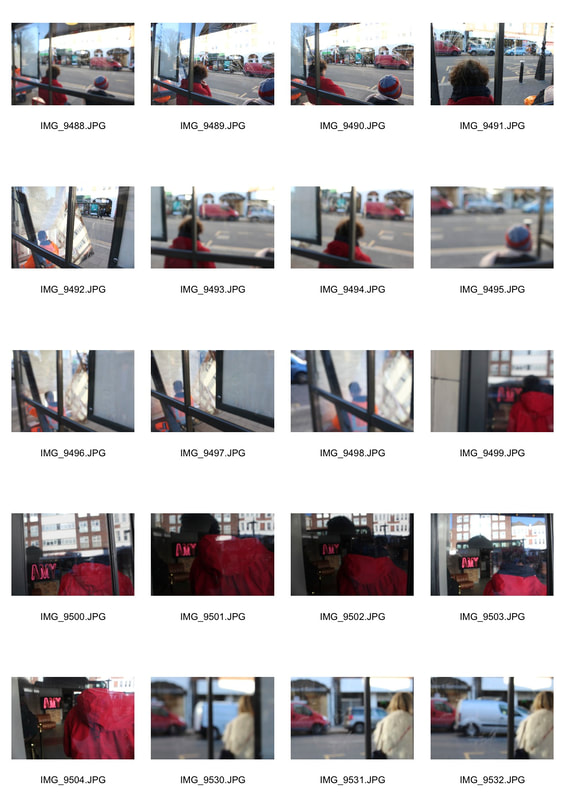
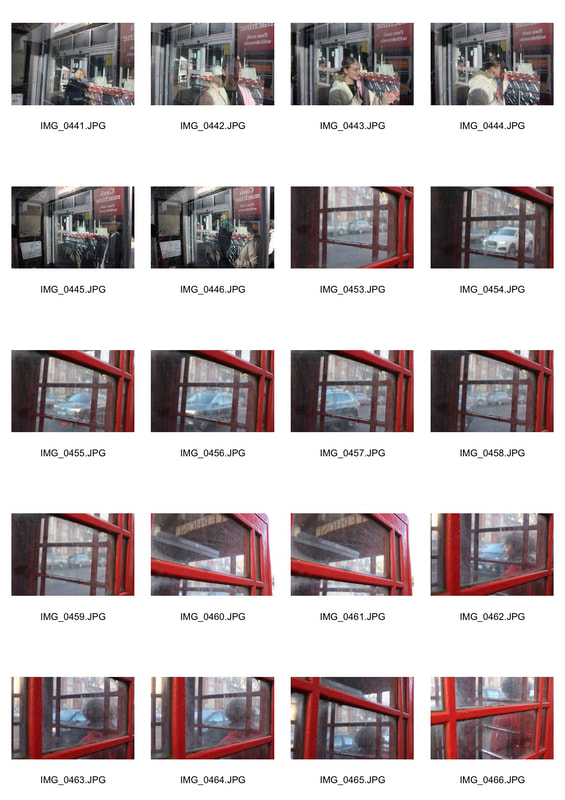
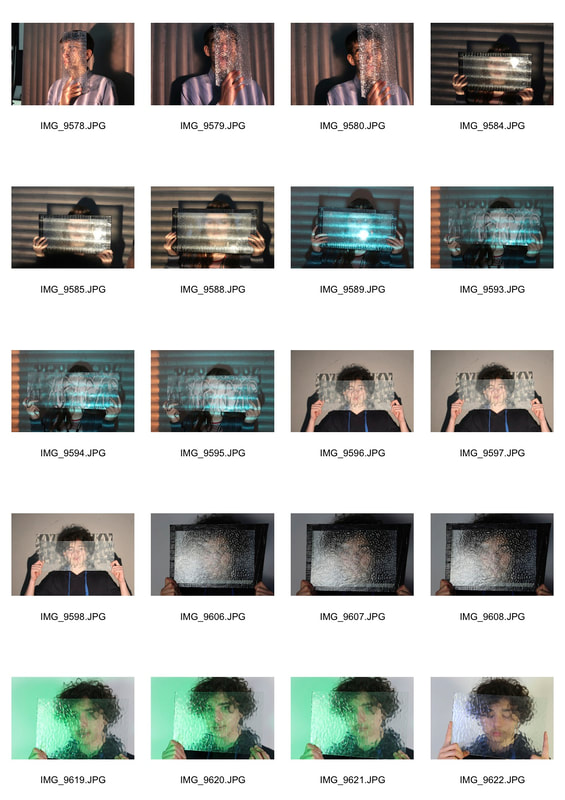
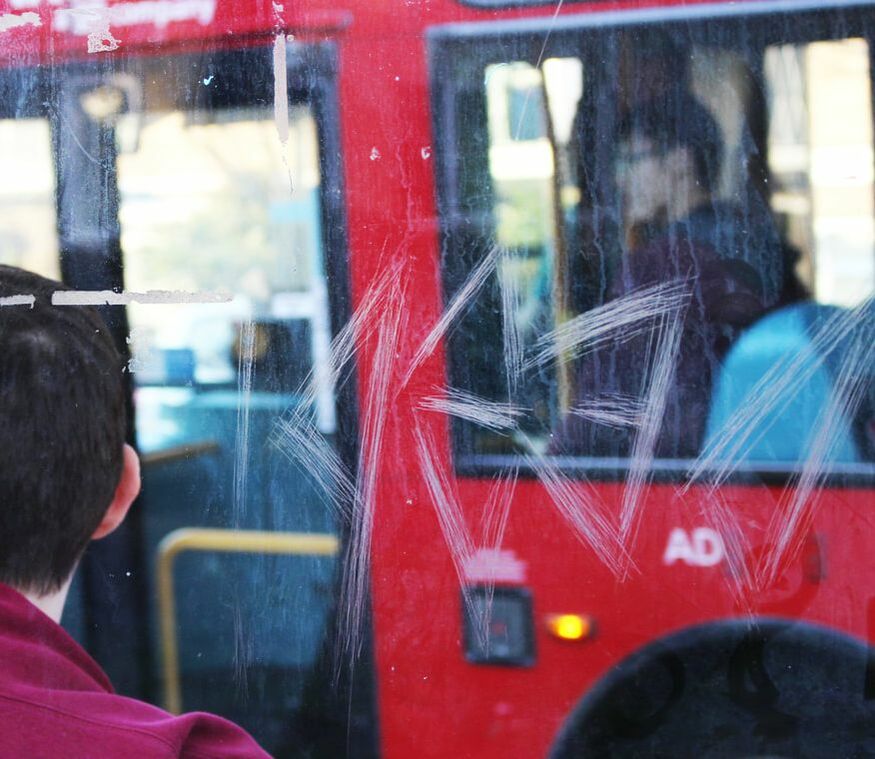
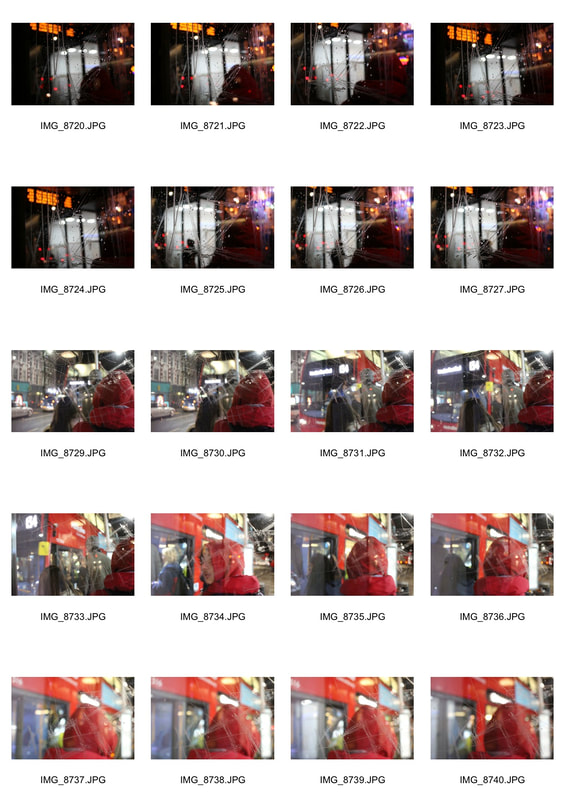
In this task I was required to use Calcutt's work and create my own set of distorted images using a bus stop. As I took my first set of images I was not getting my focus correct as shown below but as I got used to creating Calcutt's work I managed to create strong images using the right focus to have the scratches as a main point of focus while using vibrant colours as a strong contrast, for example the strong reds of the persons jumper.
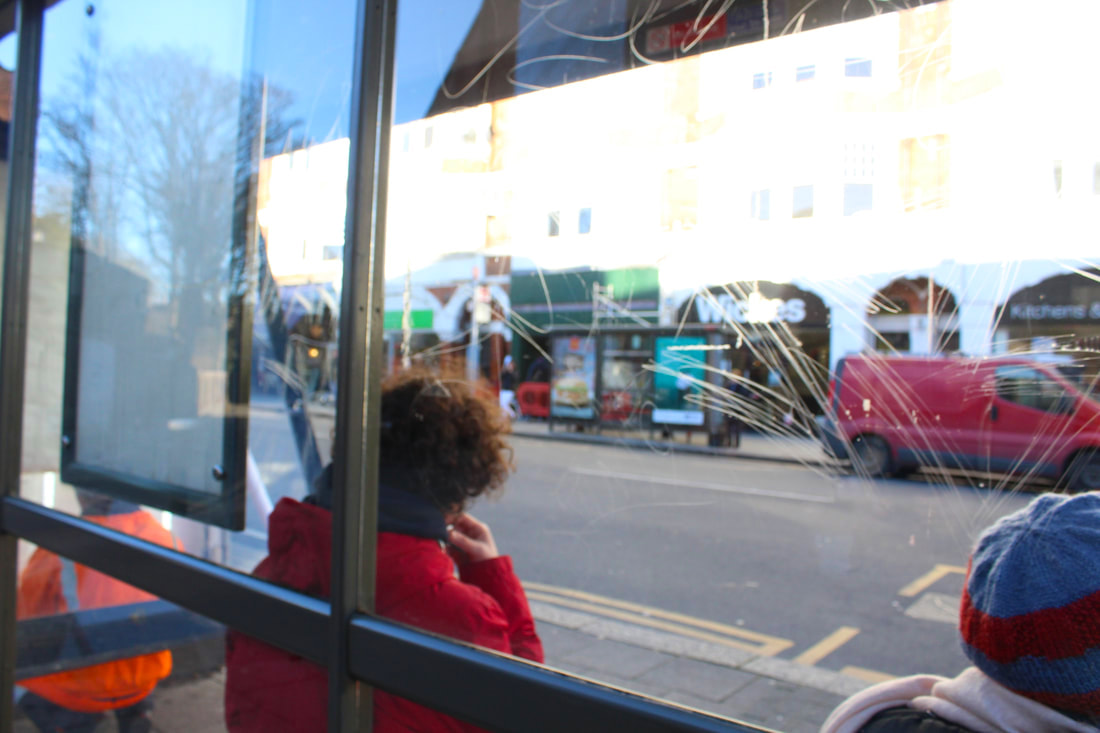
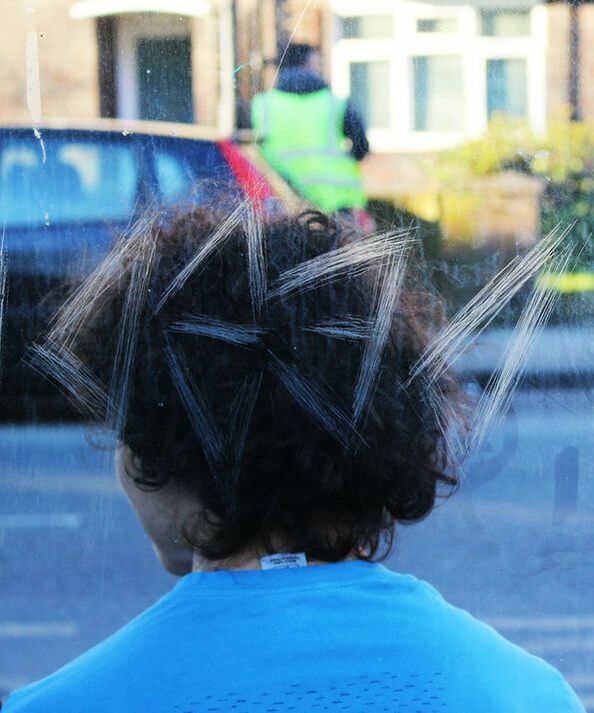
Following my first response, I focused on making sure the bus stop was more emphasized by using a more close up shot of it while having the colours stand out. The use of this was effective as it followed Stephen Calcutt's examples in more detail as he used closer angles while keeping the vibrant colours involved. I managed to have the right focus making sure everything infront of the bus stop was out of focus while keeping the virant colours visible but having the scratches more in your face. To further improve i would need to alter my shutter speed so its quicker so the less light comes in so the buildings are less over exposed.
|
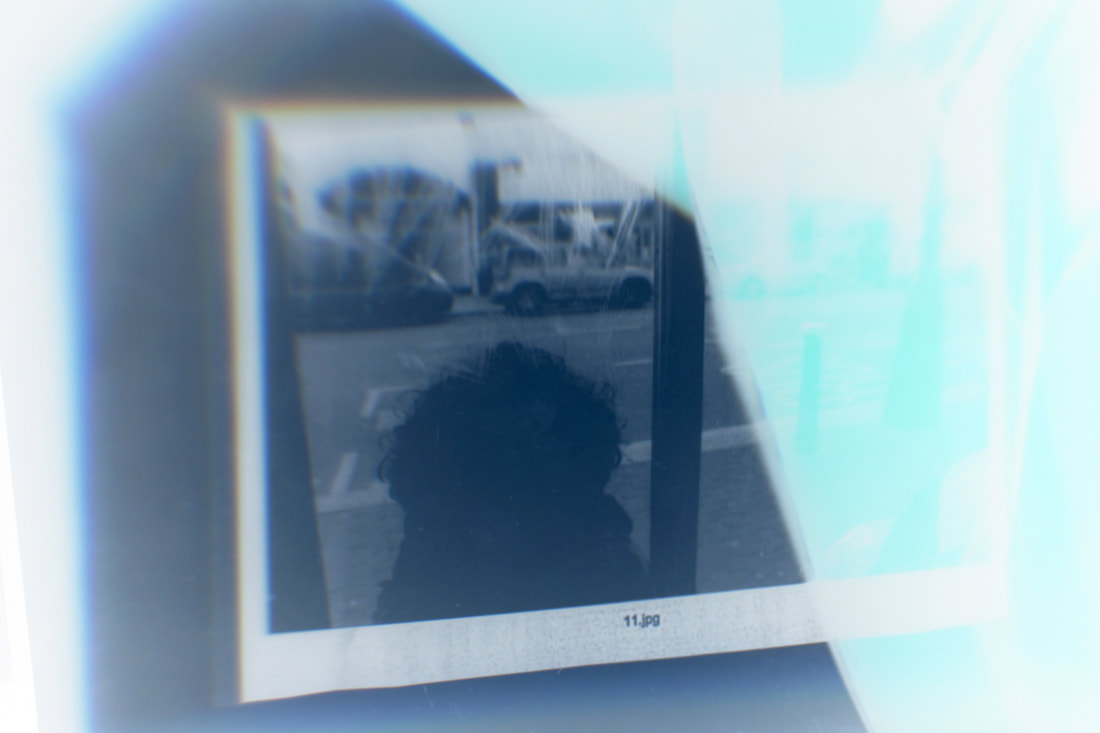
For my first response, I followed Stephen Calcutt's work and was inspired to create my own version. Doing so, I created a strong image using the scratches of the us stop as a main focus making sure what was in front of it was out of focus, I did this by using manual focus and adjusting it correctly so the parts of the image that was necessary to be in focus were in focus. There was a strong emphasis of stand out colours such as the orange and the reds while being out of focused which allowed the scratches to stand out. Although the image worked, as this was my first response the focus of the images were not to its best standard so in my next response to further improve I need to adjust the focus to make sure the bus stop stands out completely.
|
|
|
Abstract Portrait Studio Response
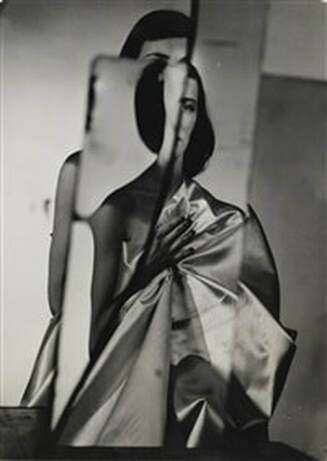
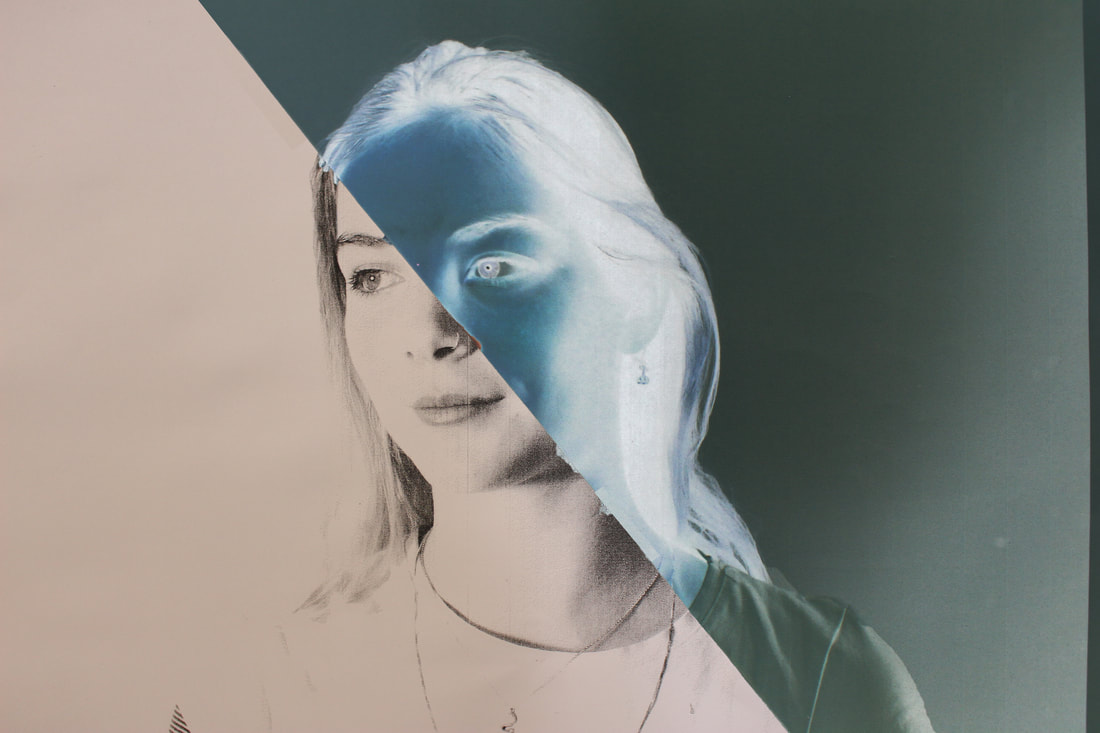
The American photographer Erwin Blumenfeld, born in Berlin was famous in the twentieth century particularly for his Nude in Broken Mirror piece of work where he was use nude women and distort their bodies using a mirror creating different types of effects. Following his work, in this task I was required to use him as inspiration and using a mirror or glass pain to distort my images and create abstract portraits.
I was inspired by Erwin Blumenfeld's work as it presented a different way of using a human body and changing its features using different techniques to create an altered version of abstraction as shown in one of his examples below. The use of using different types of glass pains which give you different types of distorted images is what I liked about it the most as it allows you to create something completely disparate and contrasting to another photographers version of a distorted image.
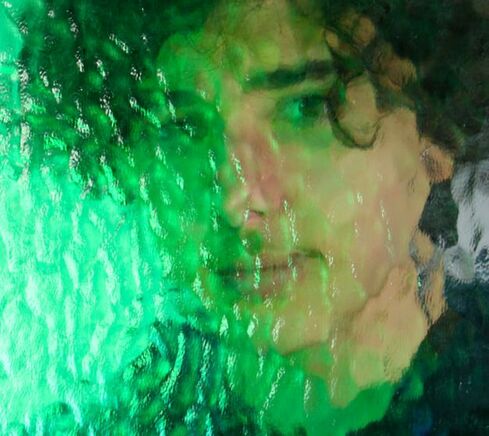
This was my final example of Erwin Blumenfeld's work and I felt like this worked best as it presented a distorted image which followed on from my second example but I added my own effect to it as the use of colour adds a different meaning as the viewer would want to know what the green light represents. The use of the light only entering on side of the face adds a greater effective as the image now has a strong contrast of colours. To further improve my image I would need to experiment using a wider variety of glass pains to see what other effective distorted images I can create.
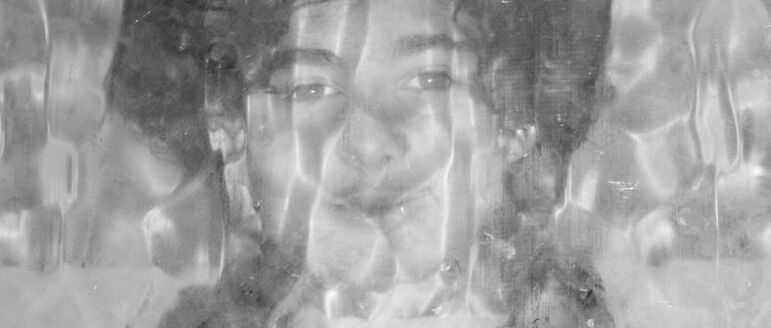
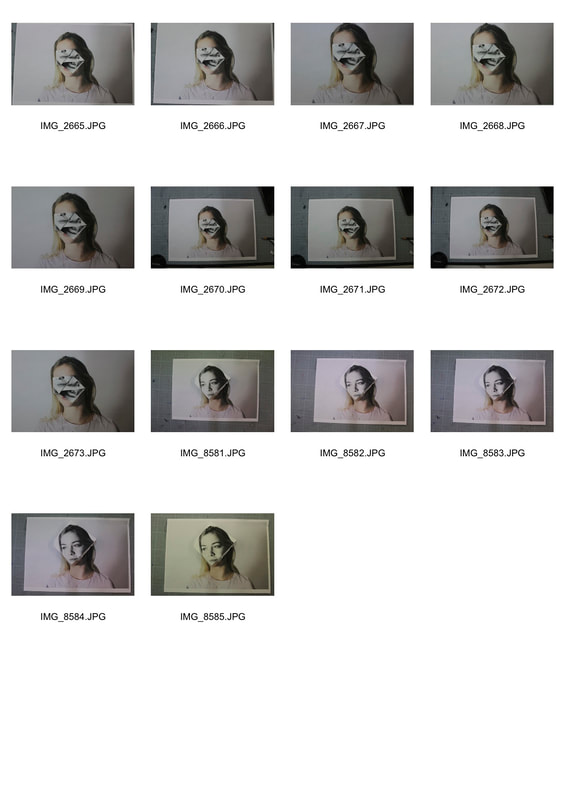
For my second piece I wanted to use a different sort of glass pain which made the subject of the image more visible. I think this worked well as his face is still distorted yet you can still understand his expression on his face. The use of the black and white filter was really emphasised to follow Erwin Blumenfeld's work and helped me execute his type of images. To further improve this image I would also need to find a larger glass pain and create more widespread images.
|
For my first response, I experimented using different types of glass pains and felt like this was effective and most similar to Erwin Blumenfeld's work in the way of not portraying the subjects facial features or expressions at all. I was inspired by his work to create this and it really gave a strong distorted image. What needs to e done to improve it is using a larger glass pain so the viewer can get a wider perspective of what is in the image.
|
Abstract Experiment
For this task I was required to take one my abstraction of street life images and develop it using the dark room using different techniques to try and create different effective pieces of work. I chose my favorite image and went through the process of using the dark room to create my images. Once using the enlarger these were the steps taken to create the finalized images. I first put the paper into developer tray and gently tapped the edges with tongs to ensure the paper is fully submerged into the liquid. I then rocked the edge of the tray gently to agitate the paper to ensure there were no bubbles, this process was for 2 minute. I then carefully removed the paper from the developer using my tongs and allowed it to drip for 7 seconds so none of the developer liquid goes into the next tray. After that, I placed my paper into the stop bath tray and gently tap the edges in and rock the tray slowly. This process was for 1 minute. I then carefully removed the paper from the stop bath and allow it to drip for 7 seconds and placed it in the fixer gently and rock the tray. This process was for 4 minutes. Lastly, I removed the paper from the fixer tray and allowed it to drip for 7 seconds and placed it in the water bath to rinse the paper. This process was or 5 - 10 minutes.
Test Strip
I used the following steps to create my test strip. Firstly I set up my enlarger to be at F11 or F8 and made sure to raise or lower my enlarger lamp to dimensions needed for the size of the paper and focused it. I then set the timer at 1 second and got my black card ready to use to set different levels of exposure on different parts of the paper. I then made sure my lamp was turned off. After this, I got a piece of test strip paper to test out making sure it was centered correctly. I then placed my image chosen on top of the test strip and started the process making sure the black card was covering different parts of the paper until the end where none of the paper is covered to allow me to know how long was best for it to be exposed. After the paper was exposed, I placed it into the chemicals and went through with the dark room process.

From the test strip, I used 4 seconds all together with 4 different sections and came to a conclusion that 2 seconds was best to get the strong dark and light colour comparisons.
First Response
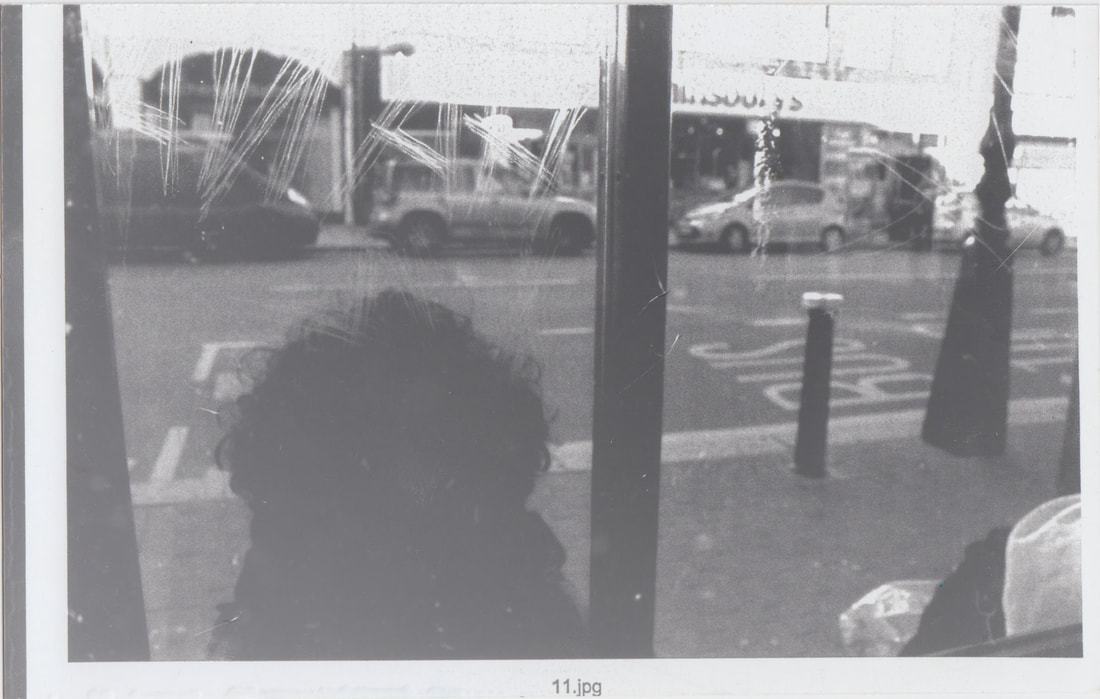
My first response worked well as the image was very clear especially sections of the middle of the image where the dark colours really came out. The main parts of the image were shown such as the scratches on the bus stop and the people in the image. One problem is that the edges of the paper were too white which did not allow the photo to get all of the details in. To improve this I will need to let my photographic paper be exposed for a longer time to allow the dark bits to come through throughout the whole paper.

Second Response
Following my first response, I decided to let the paper be exposed for 3 seconds. Having the longer time of being exposed allowed all the white areas in the previous response to not be there anymore and created a much more effective image as now more detail was involved while still having the main dark areas staying the same colour making sure the main parts of the photo were still visible such as the scratches on the bus stop. To further develop my image I would need to add different techniques to get a different type of image.
Third Response
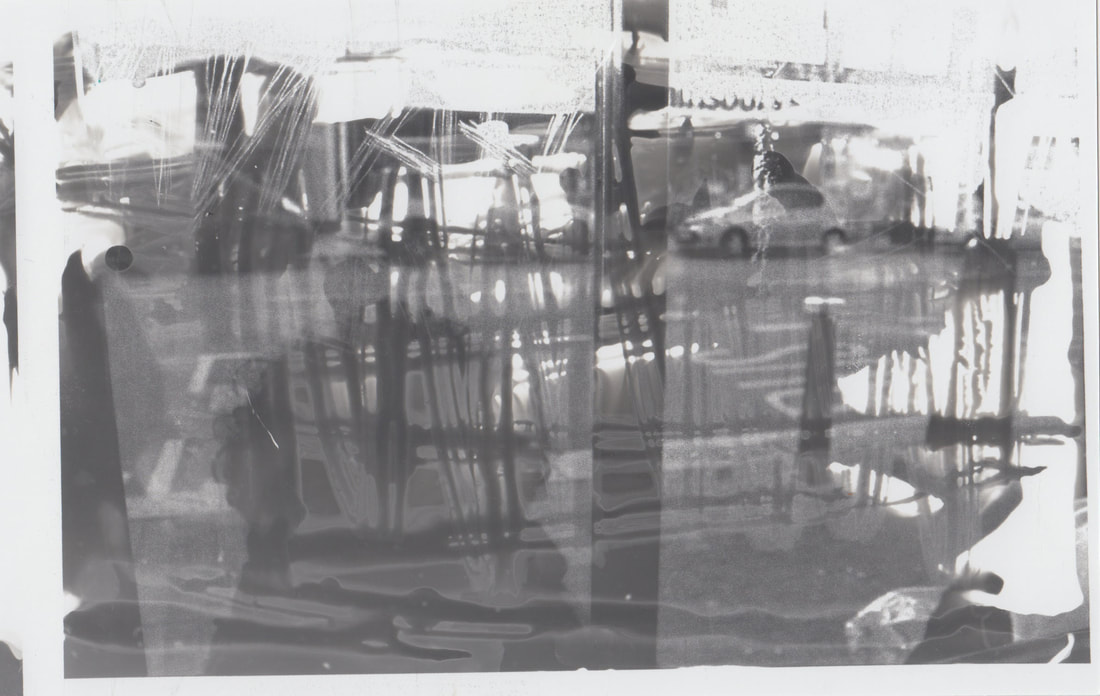
For my third response, I decided to use a different technique to try and make effective images. For this technique I used the same process with the enlarger but instead of just developing the image the normal way, I decided to use a different technique where I used a paintbrush and dipped it into the developer tray so I can develop certain areas more than others and create different designs onto my paper. I used different sort of lines in all directions making sure a heavy amount of the developer chemical was on the areas which needed to be darker for example the middle areas where the people are, and the scratches on the bus stop. Doing this was effective as it allowed me to add my own touch to the picture and distort it in my own way. To improve this I could go further into different techniques such as bleaching my prints. This will then allow to have a wide contrast of different distorted techniques used.
Toransupearento Daisuke Yokoto
Yokoto work involved him using his film developing but instead printed the image out and re photographing it using different techniques such as printing it onto acetate then using a variety of different colours to use to layer on. This allowed his work to have a different sort of vibrant and dynamic way of layering. His work is inspiring as it gives u many ways of altering your already made images. For example, the image below has many different levels of colours and distortion to it. Having a normal image then distorting it that much to create an even more effective image is what I like about it and inspired me to create my own.
First response
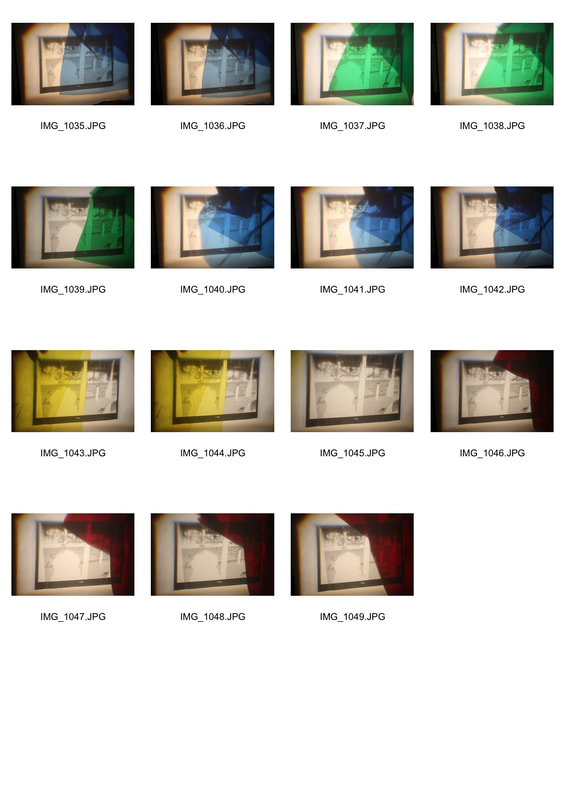
For my first response of images, I used my already printed out abstraction of street life images and using a projector and placed my image onto it which allowed it to be projected into a larger scale. I then used different colours of see through paper and adjusted it onto different places of the original image to try and create a distorted image. Following this I also put those images onto Photoshop and added colours on as it allowed me to be more precise on where I wanted the colours to be.
For my first attempt of using coloured paper, I originally placed a yellow piece of paper onto a specific area of the image to make it look distorted. After I took a image of this, I then placed it onto Photoshop and inverted the colours and this created an even greater effect as it made it look more like Yokoto's work. To further improve my image, next time I should use as well as the coloured paper, Photoshop's colours and create more precise coloured areas.
|
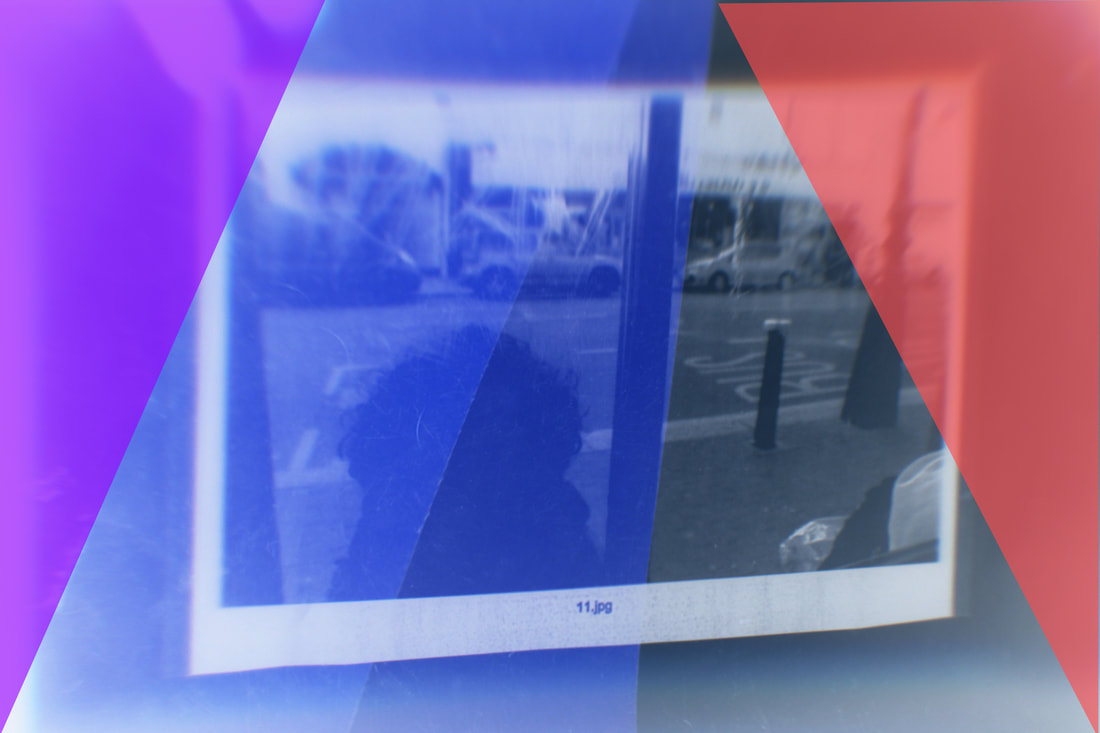
For my second attempt, I used a different example of my yellow paper images which were inverted but this time I wanted to add different colours around the edges of the image. I then added two contrasting colours of purple and red and made it look more accurate and straight. Doing so allowed me to add my own twist to Yokoto's type of work and was effective as it gave a strong contrast of a variety of colours and allowed me to distort the image in my own way. To further improve I would need to add diferent shapes of colours to different areas to further extend the level of distortion.
|
Final Response
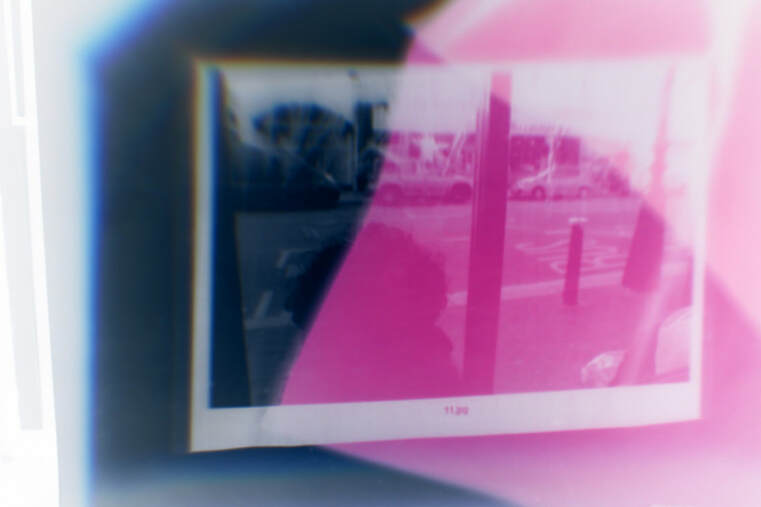
For my final response, I feel like this was the most effective for reasons such as it first followed Yokoto's work in the sense of it being the most distorted looking piece of work I created. It also created a strong contrast of three different colours from the white to dark blue to pink while having small areas of different shades of blue involved. The use of having a very dark strong blue next to a very vibrant pink emphasizes the level of distortion the colours went through. The use of the very vibrant pink also resembles how Yokoto used vibrant dynamic colours in his work. I managed to create this by placing a green coloured paper onto my original projected image, taking a photograph of it, placing it on Photoshop and inverting the colours to change it into the pink. To further improve my image I could take it a step further by adding more than one coloured piece paper to be placed on the image to allow different sections of the image being distorted.
3-D Photographic Abstraction Artists Research
Szymon Roginsky
Szymon Roginsky is a Polish photographer who worked with a fashion line and created images by using the model in a natural environment, but instead of having just a normal background, he decided to print out several of his images and created 3D sculptures of them all together using many different shapes and sizes. He then captured photos of the sculptures to finalize the images.
What I like about this piece of work is how she took regular photos of what regular people do such as relaxing on the grass as shown below and using this to create a new dynamic of photography by physically altering the images and bringing your own technique into creating something different than just using Photoshop to edit your images. Although I find this type of work creative, following these types of techniques could result in problems such as it being difficult to create the type of origami she has done if this was new to you and would raise questions as to why this can't just be done with Photoshop as there are 3D options on it.

|
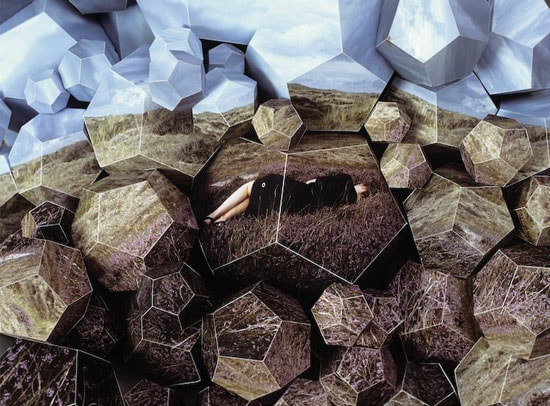
This image is very effective for multiple reasons. For example, It has taken a normal image and altered it to create a 3D sculpture and by using large shapes it allows the viewer to scope into different areas of the image to allow analyzing to take place. This will also give the viewer a greater insight into the image as there is a variety of different layers to examine which will allow different opinions on it. This range of different opinions will result in a continuous cycle of questions being asked such as, why was it taken and created in this specific way which keeps the audience guessing and ultimately is what a photographer wants from their work. Using her images will allow me to take inspiration from it such as trying to use larger 3D sculptures to allow different areas to be analyzed without an excess of the amount of sculptures being created.
|
|
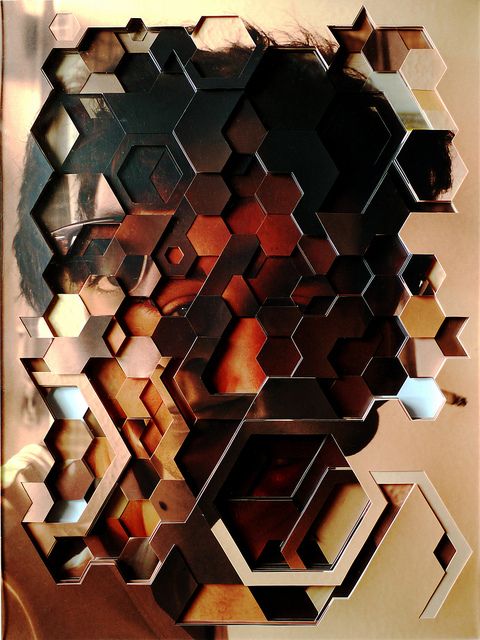
Lucas Simoes
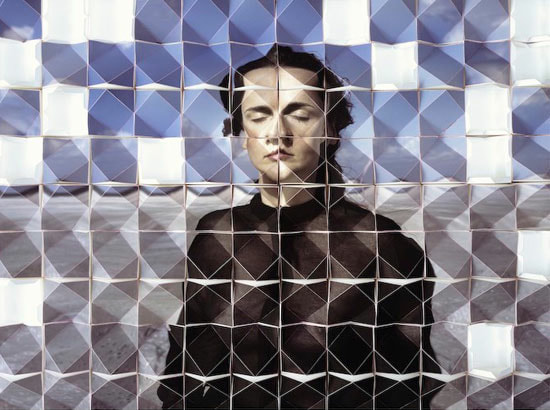
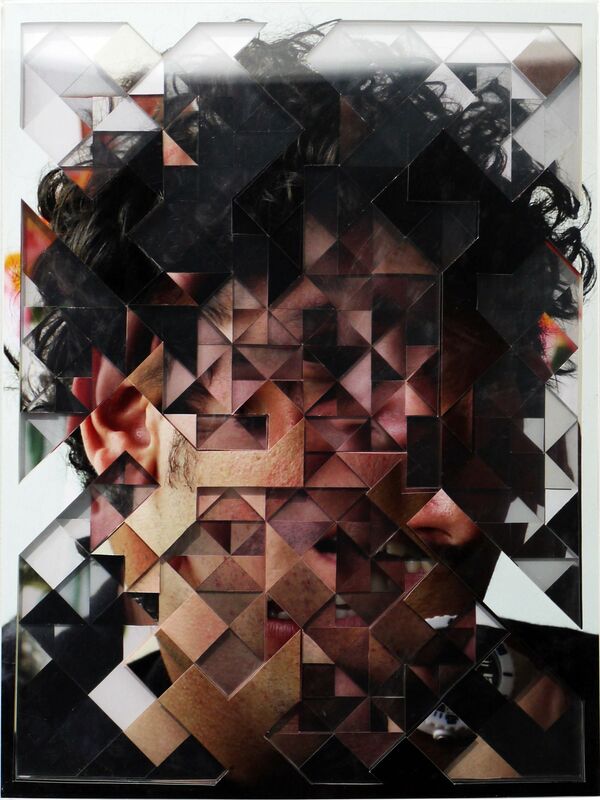
Lucas Simoes is a Brazilian photographer who has done work using a variety of different techniques based in São Paulo. For this specific work, he would have conversations with old childhood friends while capturing portraits of them. He would capture 10 images of them and use multiple geometric patterns which were not always the same but worked very well with each other and overlapped them between acrylic sheets.
What I like about his pieces of work is the creativity behind it. The use of altering someones features using cool shapes brings in a very artistic feel to it as if someone painted the images. It also creates a sense of discovery from the audiences perspective as you want to know what the person looks like. I also like how he uses his childhood friends instead of just random people as it brings an organic feel to it as its all about his life. The range if colours also adds life to the image and could represent the type of person his friends were like, for example for the red one below, you can represent him as a bold strong character but maybe also a loving person as that is some of the connotations of the colour red. Although I like this type of work, similar to the previous artist I question how difficult it is to make this and whether Photoshop could be a solution if it is too difficult.
|
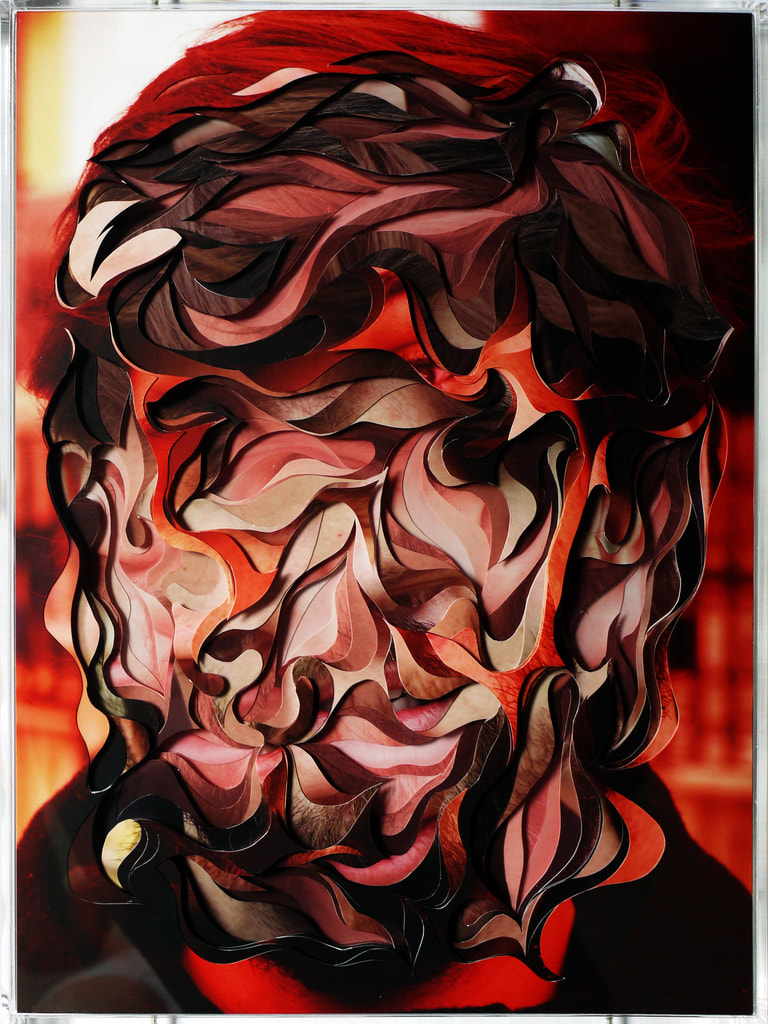
Specifically with this image, I really like the use of not just using ordinary shapes and lines. I like the use of having rounded lines going in all directions as it brings a more artsy vibe to it. The textures and the use of colours is what strikes the eyes the most, as from the other two examples he is using darker more dull colours whereas with this the colours bring a sense of vibrance and more happiness. I would also want to see him use diffrent lighter colours such as baby blues and yellows and see how they would work. The use of the vibrant colours is what I will be focusing more on when creating similar work to his and also not just using straight lines as I see this as the most effective way of going about this task.
|
|
Comparing the Artists
Following the work of both Lucas Simoes and Szymon Roginsky there are major similarities and differences in their work. The most obvious similarity being that they are both 3D but they both have a person in their images. This being either a close up or wide shot and they always raise questions as to why either the persons emotion is a certain way or what the person looks like. Although they are similar in many ways, they also differ in certain ways as well, for example the use of colours. In most of Szymon Roginsky work there is sense of dullness through the colours, even though she uses bright colours towards the top of her images, there is no life to the image. This contrasts with Lucas Simoes work as not all the colours are bright but there is areas where vibrance is visible mostly towards the center of the images. Another major differences is the use of rule of thirds. Throughout Szymon Roginsky's work the main focus of the image is always in the middle, leaving empty space in the outer thirds of the image allowing greater attention towards the most important part of the image. This differs with Lucas Simoes' work as he does not focus on the rule of thirds but rather fills out the whole image with the most important part of it. Both ways are effective as attention falls into where it is supposed to be whether you are singling out certain areas or just filling it up. In my opinion I prefer Lucas Simoes' work mainly because the use of vibrant colours really draws me into certain images but also the shapes that are being used. When comparing the use of straight lines and rounded lines Lucas Simoes uses more of the rounded lines which in my opinion are more satisfying to a viewers eyes as not everything is sharp and it gives you a more relaxed feeling to it. So for that reason, I am choosing to emulate Lucas Simoes' work as I believe it is a more effective way of creating something that is 3D.
3D Abstraction
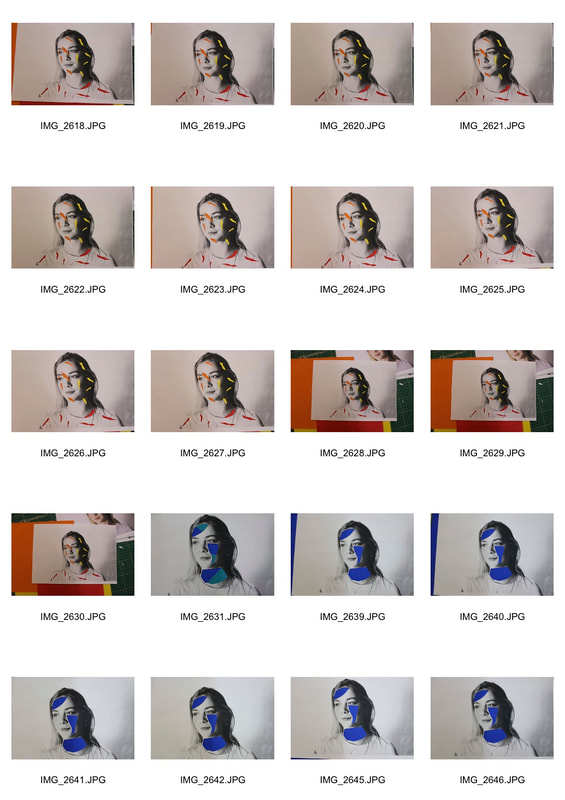
Following my 3D Abstraction research, in this task I was required to use my inspiration from my chosen artist, in this case Lucas Simoes. Using his work as inspiration, I decided to take multiple close up portraits of my friends and used multiple geometric patterns which were not always the same but worked very well with each other and overlapped them to create interesting patterns of the portrait.
First Response:
For my first response I decided to use a basic technique as it was my first attempt. Doing so, I took a close up portrait image and placed it onto Photoshop. I then made the whole image black and white to get an even stronger contrast and used the "quick selection tool" to cut the portrait in half. With the selected area I then pressed "alt and i" to invert that section of the portrait. This then allowed a difference in colours and was effective as it allowed a strong contrast in the persons face. To further develop this, I would need to dig deep into similar ways of creating a piece relating to Lucas Simoes work for example actually cutting different types of shapes in the different layers created.
Second Response :
Following my first response, I wanted to be more similar to Lucas Simoes work so I decided to cut out different areas of the portraits face and use coloured paper under it to fill the gaps in. I decided to cut out more rounded shapes as he did that in most of his works. I then took an image of it and put it on Photoshop where I duplicated the layer twice and moved them to different areas of the image. I then lowered the opacity of the different layers so you can see all 3 layers at once. This was effective as it deformed the original image while keeping important parts of it very visible which Lucas Simoes did in his work. To further develop it I would need to take this approach but instead deform the image even more so barely any of the original image is seen as Lucas would cover most of the portraits face.

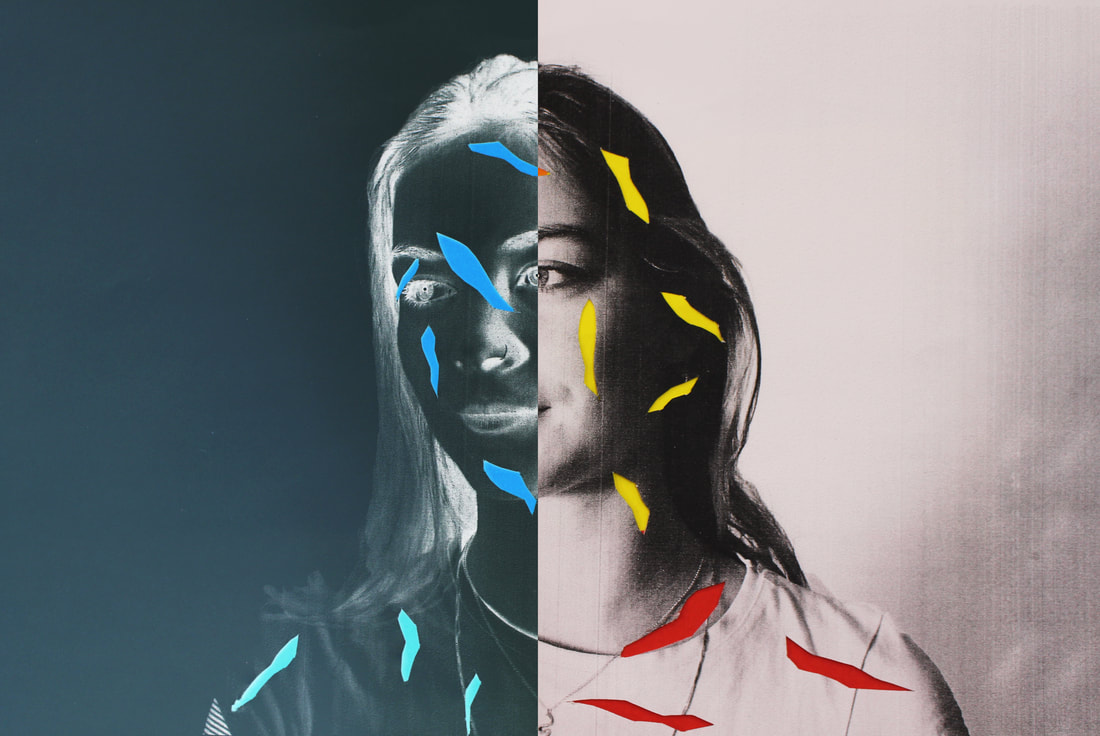
Third Response:
For my last response I decided to use both my previous responses and merge them together to create my last image. I did this by having the original image, and similarly to the second response I cut out pieces of the portraits face and this time I cut out more smaller rounded shapes in the portraits face as I realised Lucas would use a greater amount of cut outs just smaller. I then used multiple colour papers to get a strong contrast and placed them in the gaps of the holes. After this I took a final image of it and placed it onto Photoshop. From here, as shown in the first response I used the "quick selection tool" and selected half of the image and pressed "alt and i" to invert the image. Having both of these techniques allowed a strong contrast in deformity of different sections of the image and it also reflected Lucas Simoes work to a greater extent as more vibrant colours were used. To further develop this I would need to learn how to accurately make many layers so the face is barely visible while keeping the rounded shapes and vibrant colours as he did so.
|
|
|
Photographic Abstraction
Out of all the tasks I decided to choose photographic abstraction as I feel it was the most effective piece and it led to effective developments as well. I based my work off Stephan Calcutt and decided to look into his works in more detail and picked out two of his images which inspired me to create my final development:
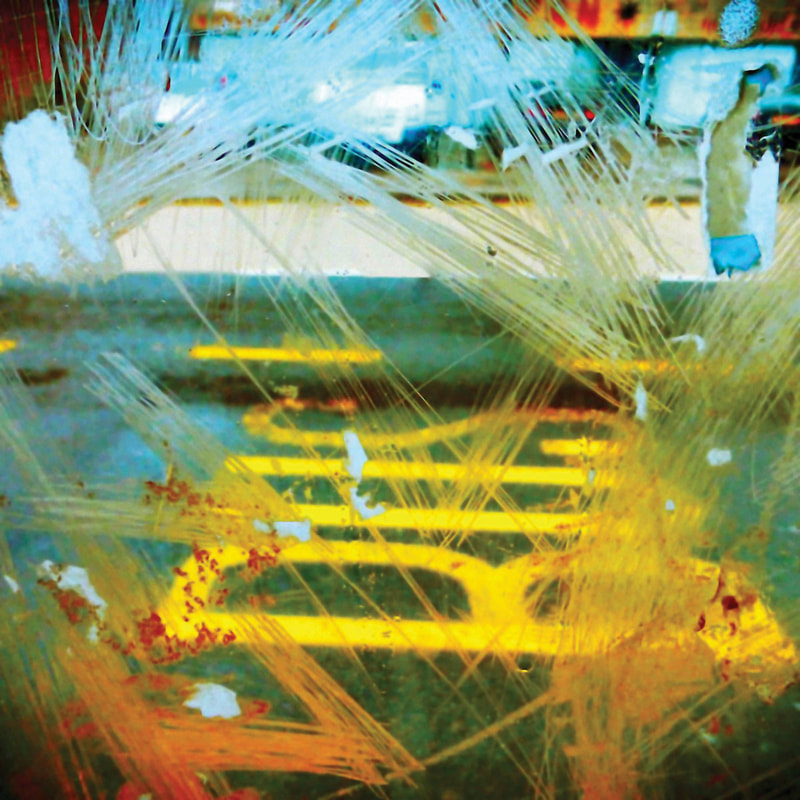
This image worked really well in my eyes as it focused on the scratches on the bus stop well but the most effective part was the use of colours. Having the vibrant yellow is eye catching and also allows a strong contrast between the scratches and the background. He also uses minimal space so the focus is only on the colours and the scratches so nothing else is distracting the main part of the image.
|
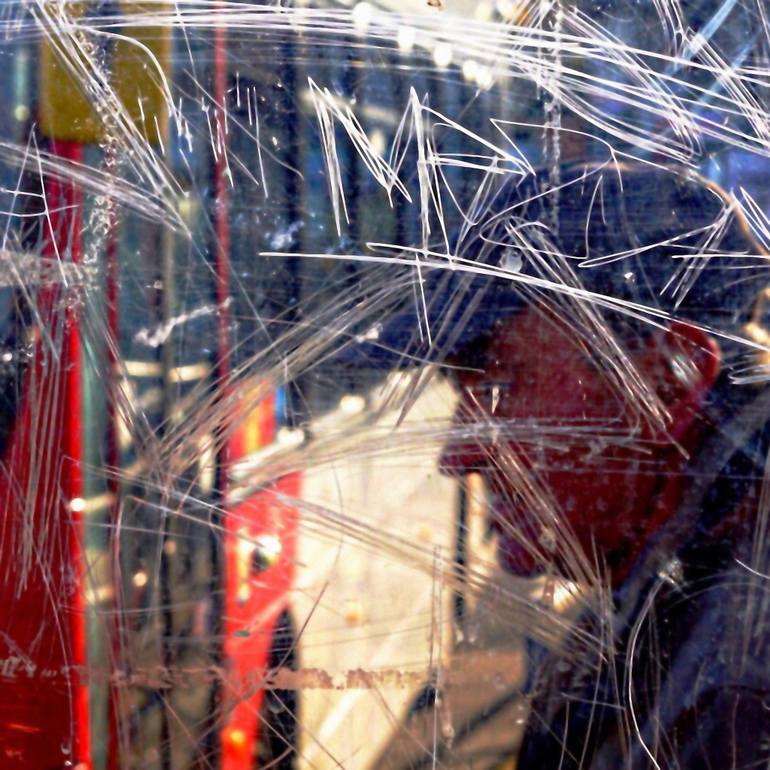
This image also worked effectively because it has the use of a person. Having this allows the viewer to want to know more as the person may have a purpose in the image. Again it uses the bus to bring the vibrant colours into it such as the red while having the main focus on the scratches. Stephan always crops his images so there is less of it so more of the focus is on the main parts so that is what I will be doing when carrying out this task.
|
Response:
For my first response I decided to use my inspiration from the examples above and go out and take some images. I found a bus stop and waited for a bus to come while having someone use his jumper as a way of capturing more colours. I made the focus correct by having the background blurry and the scratches in focus. As the bus came I managed to capture the shot I wanted and it worked effectively as the vibrancy of the colours were represented as I wanted it but also the use of a person in the shot leaving questions as to why he is there. To further develop this piece I would need to find a different bus stop that has much more scratches on it to get a stronger image that replicates Stephan's work.
For my second image, I used the same bus stop but a different person and tried to follow the first example of Stephan's work shown above. This time there was no bus involved but instead the scratches were directly in the middle so it captures your eye straight away, but also the use of even lighter more vibrant colours not only from the person sitting down, but the person in front in yellow. This worked as it adds even more vibrancy in the picture while having the background not in focus and the main part of the image in focus. To further develop this I would need to find someone wearing even brighter colours such as bright yellow. I would need to find a bus stop with more scratches, and also use Photoshop to find new ways of making it more effective such as blurring the background even more so only the main person and the scratches were visible.
|
|
Development
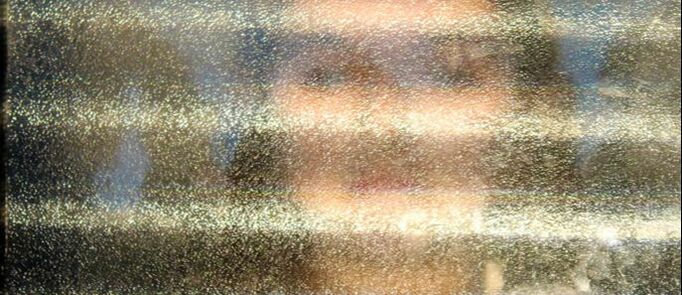
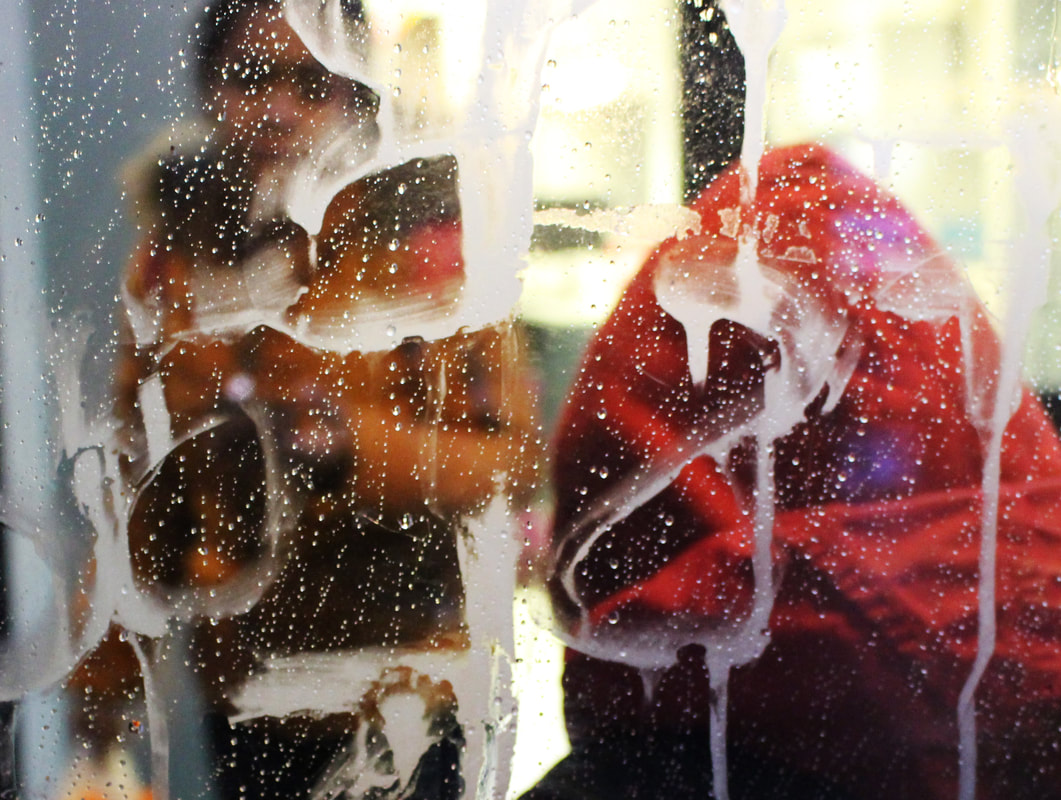
Following my first response, I decided to further develop my pieces and create examples that tried to follow Stephan Calcutt's work in a more vivid way. As shown in my research above, Stephan would used very close up shots of having the background of the image completely blurred while the graffiti is clearly visible. Knowing this I decided to follow his style and try get extreme close ups making sure none of the background is in focus as that is what I struggled with in previous attempts. I also was inspired by Nick Turpin as he would instead of using a bus stop, use an actual bus at night time and capture people through the bus window. It would be a rainy foggy day so the people inside the bus were barely visible. This would be very effective in my work as I would then be able to combine both Nick Turpin's work and Stephan calcutt's and capture my images in the night time and experiment on going on a dryer day to follow stephans work, and go on a rainy foggy day to also use Nick's work. but all images captured would be at night as that seems the most effective for capturing more lights and colours.
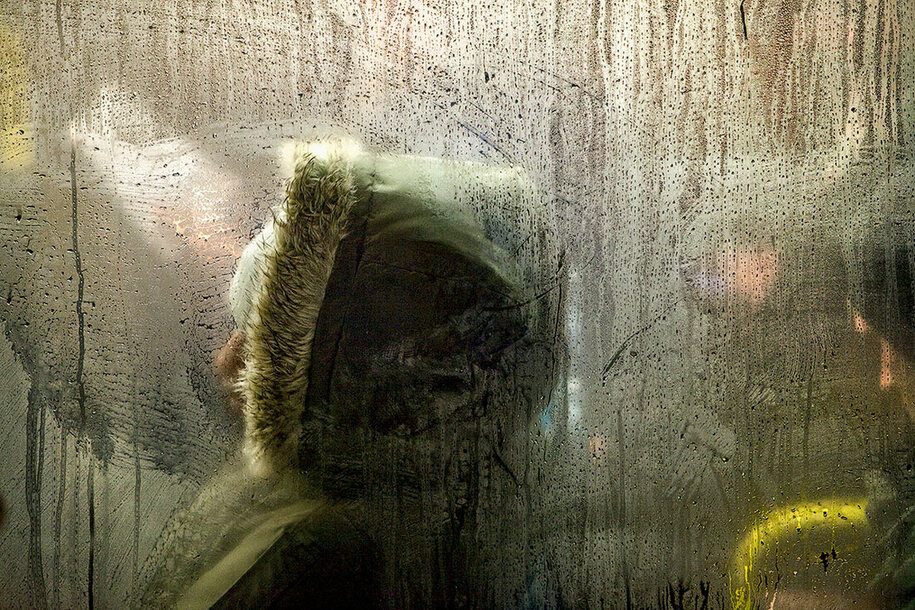
Out of most of Nick turpin's work, this is what inspired me the most mainly because of the minimality. I like the use of how he focused on someone wearing a hood instead of someone showing most of their face. I believe this is more effective as more focus will be on the surroundings rather than the person. For example, In the picture above you focus more on the actual bus window and the patterns on it, as well as the different colours involved from the persons clothing. Also using the persons clothes as another focus point would be very useful as using bright colours would bring more life to the picture. In this piece not much colour is used so for my examples I will try and use brighter colours to bring more vibrancy while using the same concept just using a bus stop instead.
First Response:
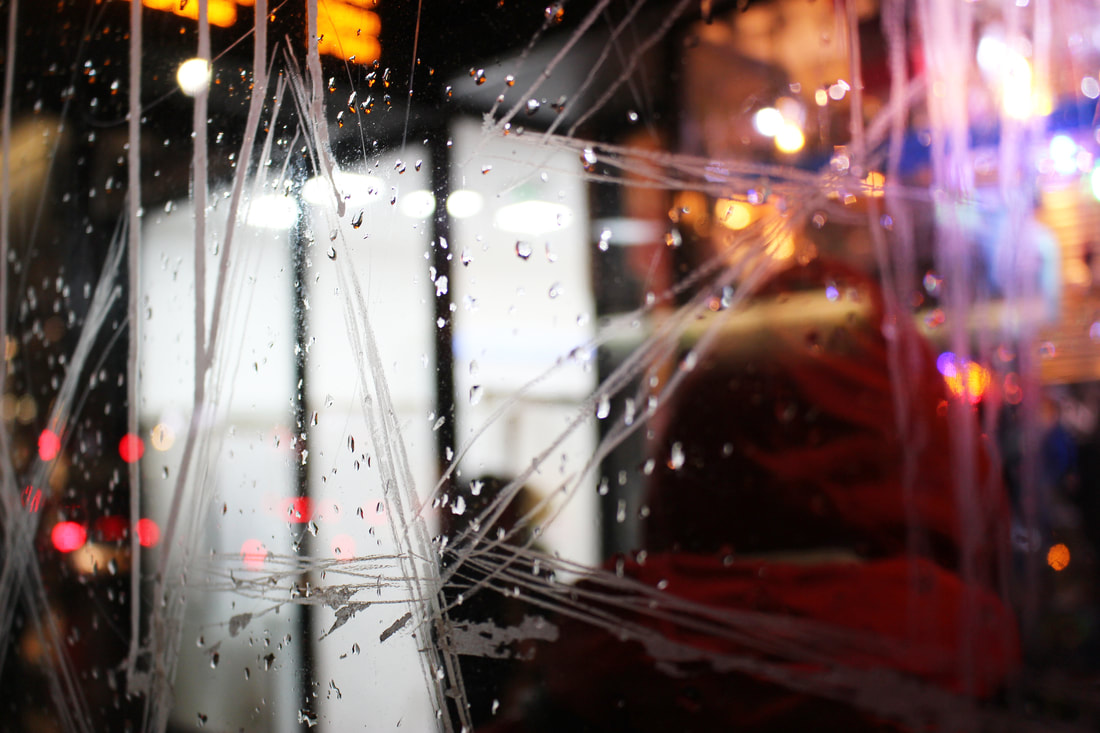
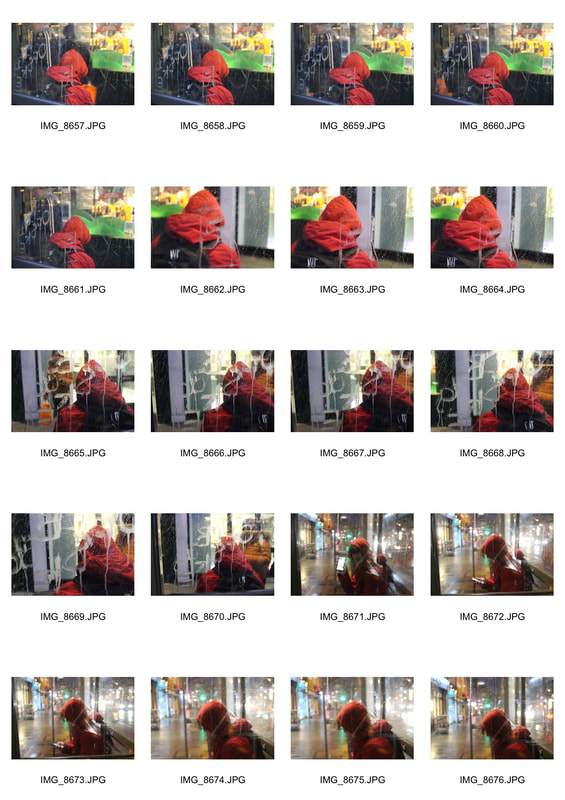
For my first response, I decided to change my way of working and shoot in the night instead of the daytime. I did this as Stephan would focus on colours as well as the graffiti, so the use of having the bright colours of car lights will be very useful in presenting that type of work. I headed out to try and find bus stops which had more graffiti on them as my previous attempts resulted in less of it. So I went and found 4 different locations with effective graffiti on them. I decided to find a different angle of a bus stop. This time I went behind the bus stop so I can capture the colour of the bus times and the light from the shops in front. I managed to capture the strong oranges and reds which brought out the vibrancy of the image. This worked well with the graffiti as the colours did not take away the focus of the image and allowed the graffiti to still be the first thing visible as it is in focus. To further develop this, I would need to try and fix the focus on the camera o there is not areas of complete blur on the actual bus stop as it took away the visibility of the graffiti on it. I would also need to focus on getting more bright colours involved in the background as the main part of colour in this image are in the corners. One way I could do this is by experimenting with car lights to add more colour to it.
Second Response:
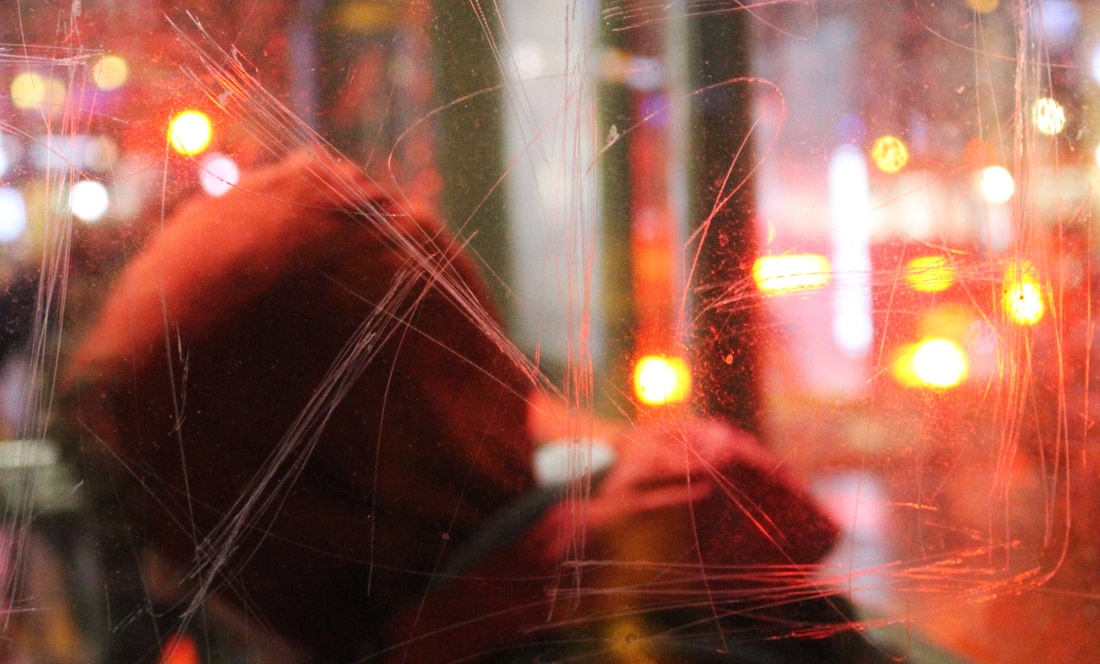
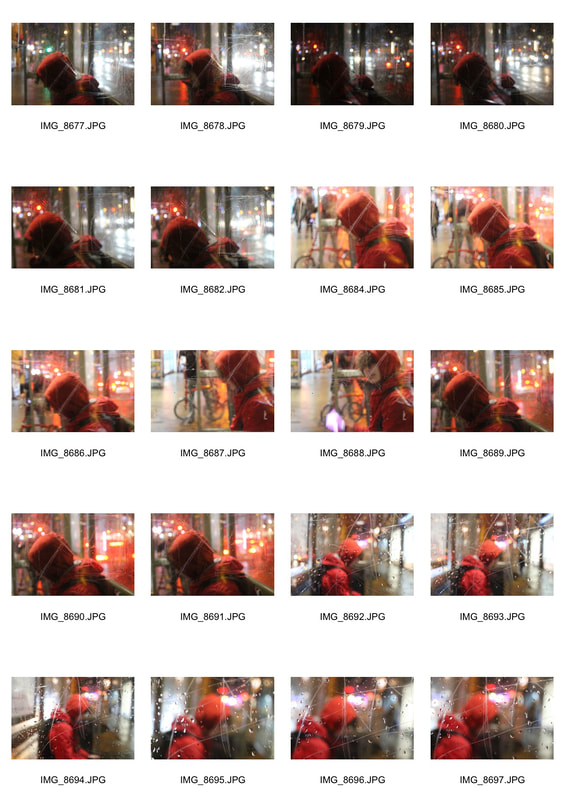
For my second response I decided to find a different angle of a bus stop. and focus on adding more colours. I used the side of the bus stop as it allowed me to get a clearer profile of the person involved in the image. I managed to capture the red jumper of the person while getting the red car lights to allow a strong vibrancy of red while making sure the graffiti was in focus. This was very effective as not only did I manage to capture that much colour, but also kept the picture very minimal so the focus is on the graffiti. To further develop this, I would need to find a way of capturing more people, specifically wearing different colours than just red so there is a comparison of colours, This will follow Stephan's work and be effective for example, in one of his works above there is a strong contrast of red with the persons dark clothing which works very well.
Third Response:
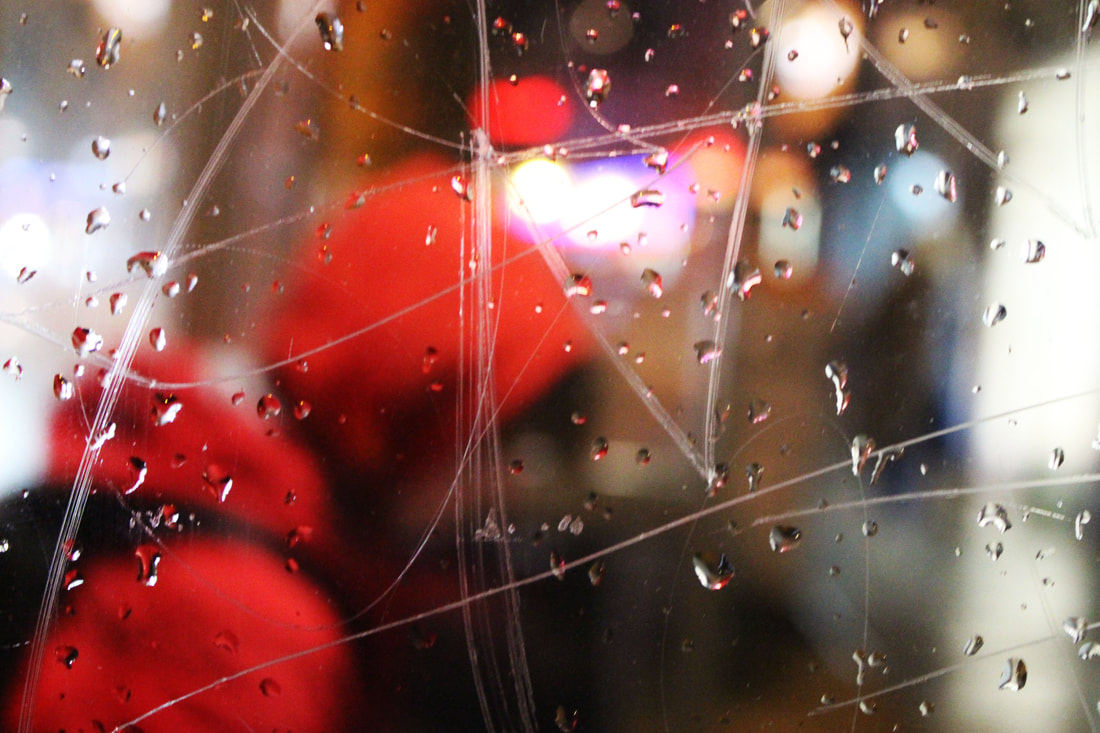
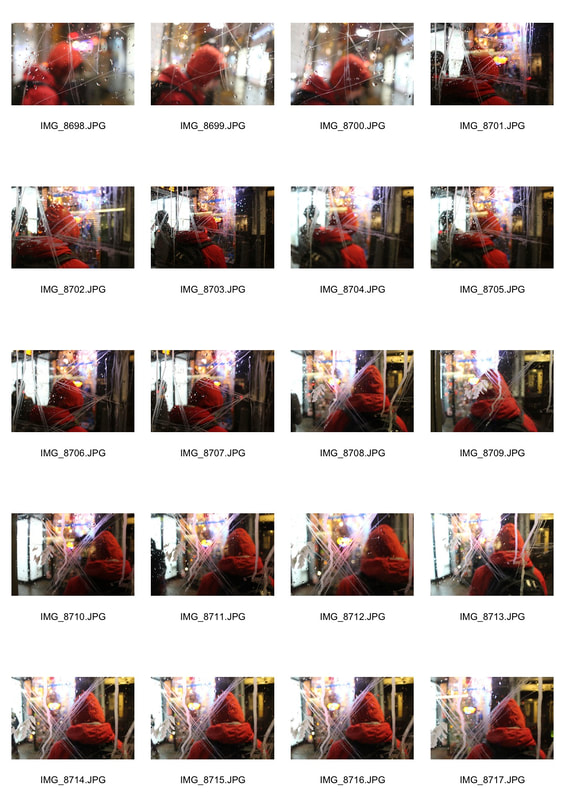
For my third response, I wanted to try out a different technique. I did not focus plainly on using my development idea as stated in the previous response as I wanted to leave that for my final piece. Instead I decided to experiment with finding out how close I could get to the graffiti on the bus stop while having the colours in the background. I did this because I was fascinated by how close up Stephan would be. Because of this, I only focused on getting a strong image of the graffiti rather than the colours as well as I would try that later on. Doing so, I managed to create a very strong image of the graffiti. This was effective as the very extreme close up meant that the graffiti stood out and captures your eye straight away. This also allows the viewer to ask questions as to why the person behind it is so firmly blocked by the graffiti. To further develop this, I would need to try and capture these sort of images on a dryer day as the rain takes away the focus of the graffiti. I would also need to try and perfect my focus as some areas of the bus stop are blurred slightly so I would need to spend longer on fixing this.
Final Piece
For my final piece, I managed to find a very heavily graffiti bus stop with more so white paint instead of scratches. I decided to go at the night time and went behind the bus stop instead of the side as the most graffiti was on the back of the bus stop. Not only did I choose this bus stop for the purpose of the graffiti but also because of what I was planning to do for my development as stated in my second response. This was to capture more people who were at the bus stop. I managed to find someone wearing a bright colour of yellow which worked very effectively. This was effective as I created an image with two contrasting colours which allowed more vibrancy in the image. This balanced out with the amount of graffiti on the bus stop as now there was more graffiti and more people which allowed more to focus on. I captured the image with the perfect focus as the white paint is in focus completely with no blurred parts on the side or corners, while having the background and the people in it completely blurred. Although Stephan would focus primarily on scratches, I used my inspiration of his work and my ideas to put together something different which still worked as effectively. To further develop this even more, I would again need to go on a dryer day so less focus is on the rain and more on the graffiti. I would also need to make sure that if there is a white background behind it, that I do not let that expose that specific area of the image. I would do this by changing my shutter speed to a smaller number so the shutter is quick resulting in less light coming into the camera and so a less exposed image. What I could also do it use both my ideas of the more people and different type of graffiti to find a new bus stop with these specific things but instead include the lights of the cars as they were the most effective way of bringing that high amount of vibrancy.
|
|
|
|
