PHOTOGRAM
Process of creating a Photogram:
1. First step is to set up your enlarger to be at F11 or F8 and make sure your filter is on 3.
2. Second step is to raise or lower your enlarger lamp to dimensions of 5x4 paper and focus it.
3. Third step is to set your timer to 3 seconds, so the light is not exposed for too long or too little of time.
4. Fourth step is to make sure your lamp is turned off.
5. Fifth step is to grab a piece of photo-paper and make sure it is centered under your 5x4 light.
6. Sixth step is to place the desired objects you would like to use according to your design.
7. Seventh step is to hold a piece of cardboard above 2/3rd of your paper with objects and press your timer light. Then when the timers done, cover the second 3rd of your paper and press the timer light. Then when the timers done, remove the cardboard and expose your whole paper to the light and press the timer for the third time. Now your test strip is ready to develop.
8. Eighth step is to repeat these steps with a new paper knowing how many seconds is best to expose the light on your paper and place your objects on to your new paper and start the timer. Now you are ready to develop your final print.
Test Strip
For my first attempt of creating a photogram I randomly set an exposure length as I was getting to grips at what exposure time was right. I managed to create an outcome of a photogram that was overly exposed and did not get that correct sharp black and white textures. I then manged to test out different amounts of exposure of light to the paper to understand how long was right for a good photogram. I first tested out 3 seconds and came to a realisation that that amount of exposure was to weak and allowed me to create only grey and white colours and barely any black, the sharpness of the image was still weak. I then tested out 6 seconds, and realised that it managed to create fairly sharp white colours but still not strong enough black textures to really bring the photogram alive. Finally I tested out 9 seconds and came to a conclusion that after testing 3 seconds, 6 seconds, and 9 seconds, that 9 seconds was the best time to create a sharp black and white tone for a perfect photogram.
For my first attempt of creating a photogram I randomly set an exposure length as I was getting to grips at what exposure time was right. I managed to create an outcome of a photogram that was overly exposed and did not get that correct sharp black and white textures. I then manged to test out different amounts of exposure of light to the paper to understand how long was right for a good photogram. I first tested out 3 seconds and came to a realisation that that amount of exposure was to weak and allowed me to create only grey and white colours and barely any black, the sharpness of the image was still weak. I then tested out 6 seconds, and realised that it managed to create fairly sharp white colours but still not strong enough black textures to really bring the photogram alive. Finally I tested out 9 seconds and came to a conclusion that after testing 3 seconds, 6 seconds, and 9 seconds, that 9 seconds was the best time to create a sharp black and white tone for a perfect photogram.
6 ideas for photograms
- Stencilling
- Solarisation
- Exposure
- Painted Developer
- Weave
- Normal photogram
- Solarisation
- Exposure
- Painted Developer
- Weave
- Normal photogram
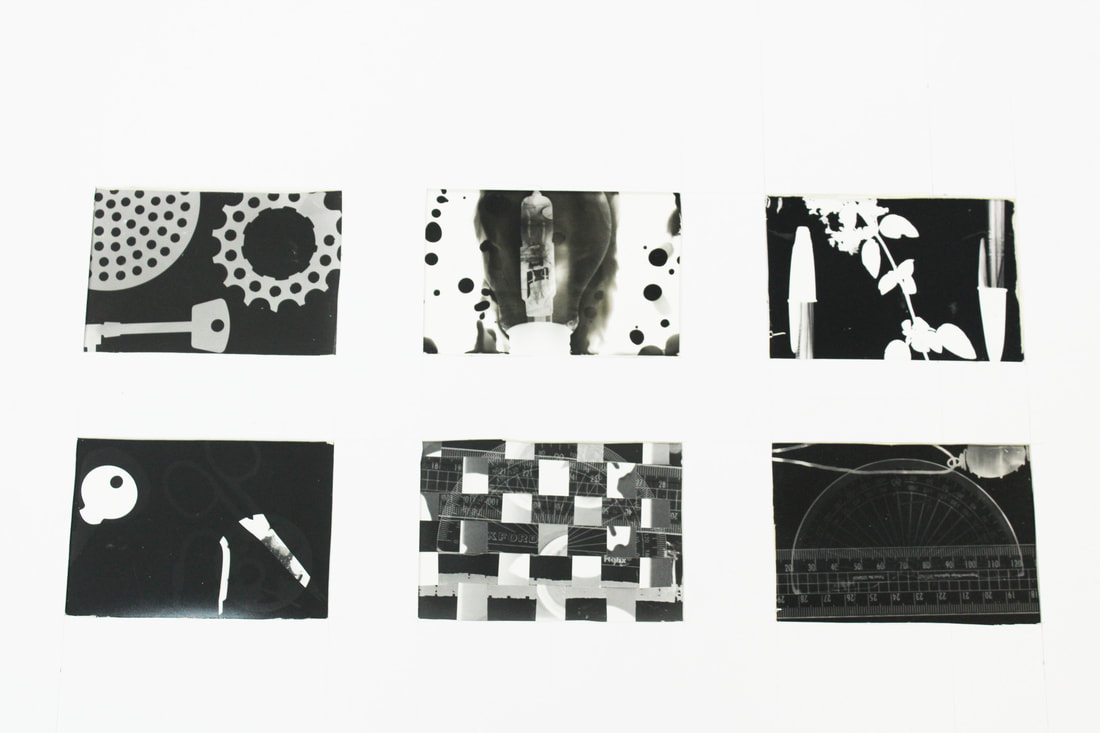
Photograms
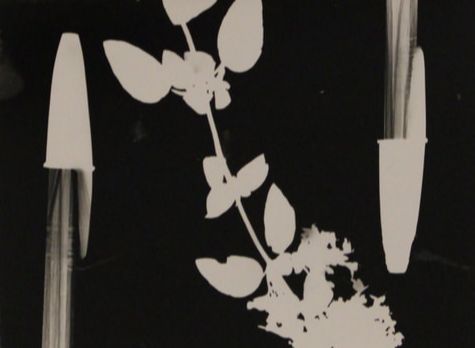
For my first photogram, I took on the original stencil process by using the objects of two pens and a plant . I created this by setting the enlarger to f8. I then exposed the paper with the objects on it for 6 seconds as my test strip previously worked best at 6 seconds. I then removed the objects off my exposed paper and began to start developing. I first put the paper into developer tray and gently tapped the edges with tongs to ensure the paper is fully submerged into the liquid. I then rocked the edge of the tray gently to agitate the paper to ensure there were no bubbles, this process was for 2 minute. I then carefully remove the paper from the developer using my tongs and allow it to drip for 7 seconds so none of the developer liquid goes into the next tray. After that, I placed my paper into the stop bath tray and gently tap the edges in and rock the tray slowly. This process was for 1 minute. I then carefully remove the paper from the stop bath and allow it to drip for 7 seconds and place it in the fixer gently and rock the tray. This process was for 4 minutes. Lastly, I removed the paper from the fixer tray and allowed it to drip for 7 seconds and placed it in the water bath to rinse the print. This process was or 5 - 10 minutes. Once the paper is rinsed, my stencilled photogram was produced. The outcome of this technique was good as it produced the sharp different colours of white and black. What needs to be better is it needs to also include the sharp grey colours as well and I need to be more careful with avoiding white splashing going onto the black colour as it really takes away the affect of this technique.
Solarisation
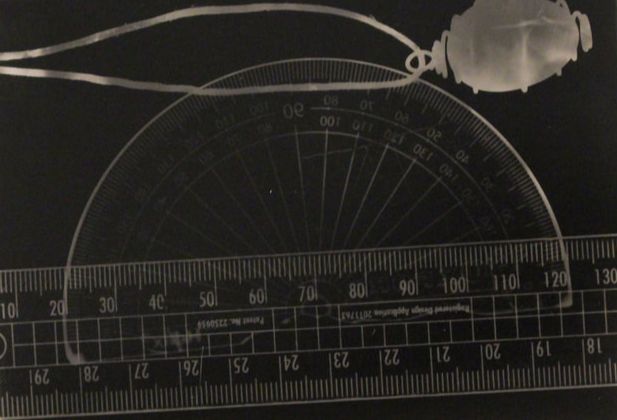
For my second photogram, I wanted to take on solarisation by using pencil case equipment. I used a protractor and a ruler to create this photogram. I also created this by setting the enlarger to f8. I then exposed the paper with the objects on it for 3 seconds as my test strip previously worked best at 3 seconds. I then removed the objects off my exposed paper and began to start developing. I first put the paper into developer tray and gently tapped the edges with tongs to ensure the paper is fully submerged into the liquid. I then rocked the edge of the tray gently to agitate the paper to ensure there were no bubbles, this process was for 10 seconds. I then carefully remove the paper from the developer using my tongs and allow it to drip for 7 seconds so none of the developer liquid goes into the next tray. I then placed my print straight to the water bath and let it rinse, this process was for 10 seconds. After this, I let the water drip off my paper and placed it back onto the enlarger and exposed the paper for another 3 seconds. Lastly, I placed the paper into the developer tray and repeated the normal steps to creating a photogram as shown in the stencil transition. Once the paper is rinsed, my Solarised photogram was produced. The outcome produced is very well crafted as you can clearly tell this has undergone the solarisation technique. If you compare this to photographer examples of this technique, then you can really see the similarities in colour which I think were produced good.
Double Exposure
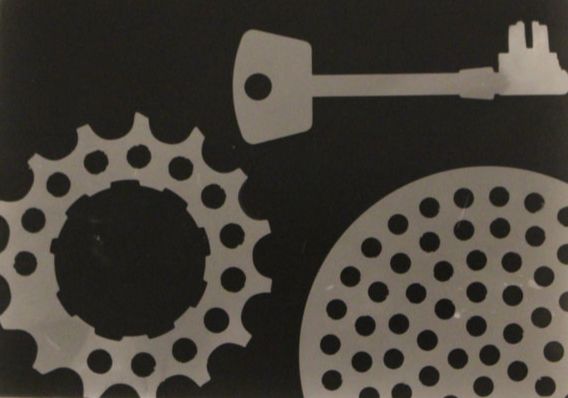
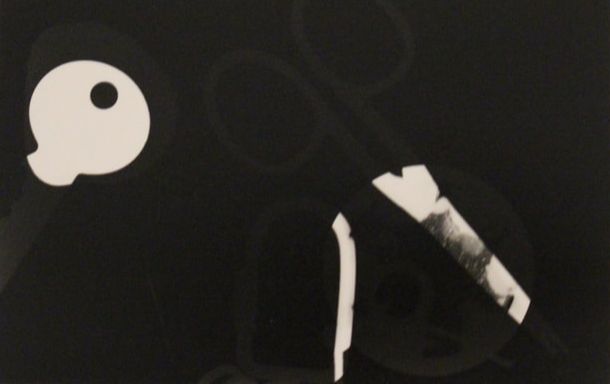
For my third photogram, I wanted to take on exposure by using a key and a pair of scissors to create this photogram. I also created this by setting the enlarger to f8. I then exposed the paper with the objects on it for 6 seconds as my test strip previously worked best at 6 seconds. I then removed the objects off my exposed paper and placed them in a different order and exposed it for another 6 seconds. Lastly, I placed the paper into the developer tray and repeated the normal steps to creating a photogram as shown in the stencil transition. Once the paper is rinsed, my exposure photogram was produced. The outcome was very good having sharp differences in both white black and grey colours. You can vividly see the different colours of the different objects which I think made it much more effective.
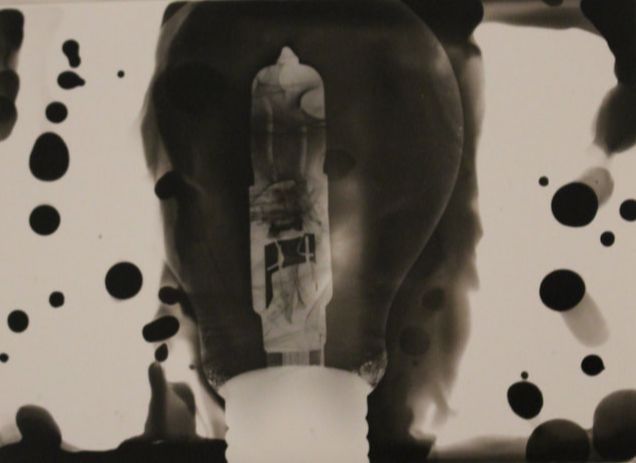
Painted Developer
For my fourth photogram, I wanted to take on painted developer by using a light bulb directly in the middle of the paper to create this photogram. I also created this by setting the enlarger to f8. I then exposed the paper with the objects on it for 6 seconds as my test strip previously worked best at 6 seconds. After this, I used a paintbrush and dipped it into the developer tray and dabbed and spread the liquid around different places on the paper making sure there was enough where the light bulb was placed to make it visible. I then let it process for 2 minutes. Next, I repeated the normal steps used in the stencil process. Once the paper is rinsed, my painted developer photogram was produced. The outcome provided the right idea of what technique I was following with a range of different shapes, but maybe the use of more dots in the areas of white would have been more effective as I think there is an excess of white areas being exposed.
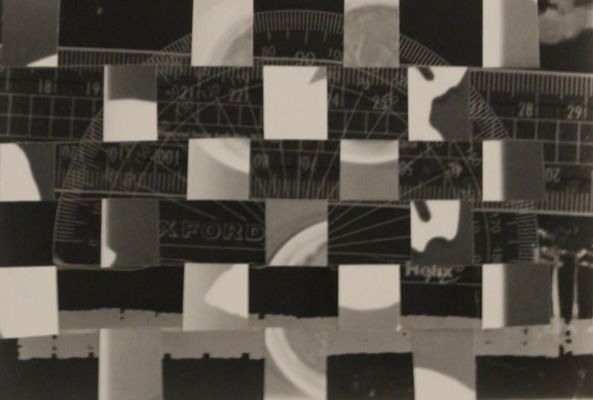
Weave
For my fifth photogram, I wanted to take on weaving by using two stenciled photograms using random objects on both photograms by following the process used in the stencil transition exposing the paper for 6 seconds. I also created this by setting the enlarger to f8. I then cut 3/4 of one of the photograms vertically, then cut equally spaced strips of the second photogram all the way through horizontally. Next, I weaved the strips of paper into the first photogram until all strips are used. After that, when the strips were placed correctly, I glued each strip onto the first photogram. Once the paper was glued together, my weave photogram was produced. The outcome of the weave was really good as both prints originally were well done photograms leaving the weaving part much easier to be more effective.
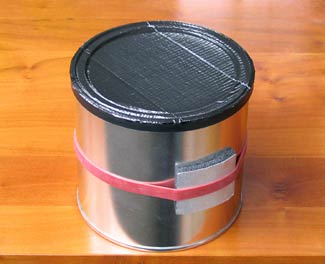
The Pin Hole Camera
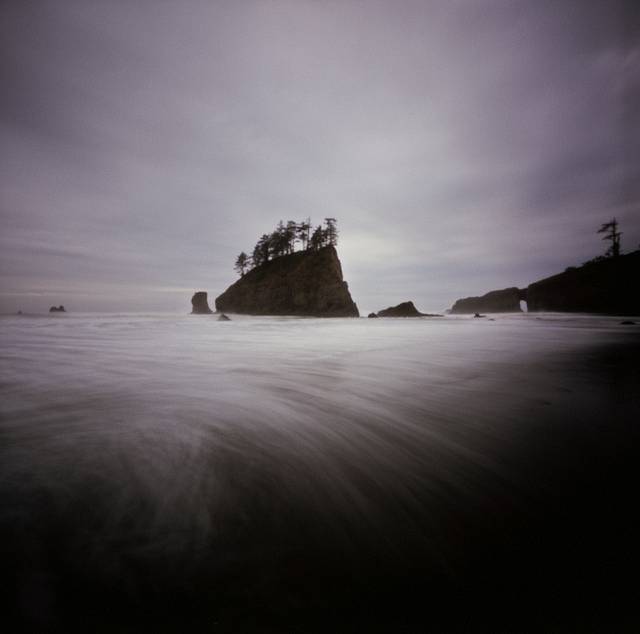
A pinhole camera is the simplest camera possible. It consists of a light-proof box, a sort of film and a pinhole. The pinhole is simply an extremely small hole you would make with the tip of a pin in a piece of thick aluminum foil. Light from a scene passes through the aperture and projects an inverted image on the opposite side of the box, which is known as the camera obscura effect.
Benjamin Postwalt
“Pinhole photography means slowing down. It means achieving a personal peace when there’s nothing left to do but lose myself in the horizon and the changing tide of a coastal scene as I wait for the camera to finish an eight-minute exposure at dusk. It means maybe making only two or three frames of film count for an entire day. It’s beautifully primitive and simplistically pure. I feel unbridled. I no longer fret about battery life or memory cards or spend a minute debating what lens to use next. It’s just a little wooden box, unfiltered, absorbing the world. And I’m by its side doing the same.”
Source - https://www.thephoblographer.com/2017/04/26/7-pinhole-photographers-to-inspire-you-for-world-pinhole-day/
Source - https://www.thephoblographer.com/2017/04/26/7-pinhole-photographers-to-inspire-you-for-world-pinhole-day/
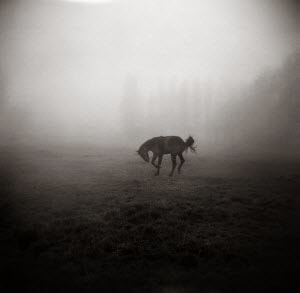
Alan Thoburn
“I always used a tripod and an exposure calculator (I think it came with the camera, and was based on the size of the pin hole) Basically, it allowed you to take a conventional lightmeter reading, and adjust it using a special chart. I’ve always been strict about technique, and wanted my exposures to be correct, sad I know! I used a slow black & white film, either Ilford Pan F or Ilford FP4, processed at home".
Source - https://www.thephoblographer.com/2017/04/26/7-pinhole-photographers-to-inspire-you-for-world-pinhole-day/
Source - https://www.thephoblographer.com/2017/04/26/7-pinhole-photographers-to-inspire-you-for-world-pinhole-day/
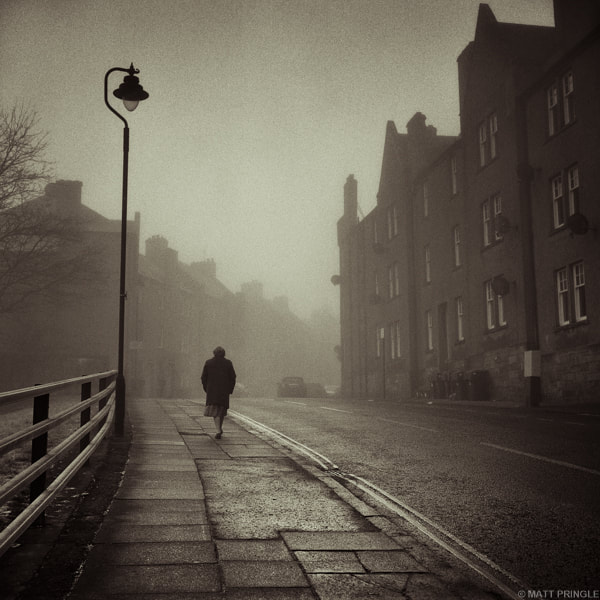
Matthew Pringle
“There is certainly a degree of guess work and unpredictability with regards to pinhole photography and that is part of its charm for me. You’re never entirely sure how things will turn out and that can sometimes work in your favour. Understanding exposure times and metering is vital if you want to obtain an image with a good balanced exposure. However, there have been times when I’ve horribly under-exposed a pinhole shot and the resulting darkness of the image has added greatly to its atmosphere and feeling.”
Source - https://www.thephoblographer.com/2017/04/26/7-pinhole-photographers-to-inspire-you-for-world-pinhole-day/
Source - https://www.thephoblographer.com/2017/04/26/7-pinhole-photographers-to-inspire-you-for-world-pinhole-day/
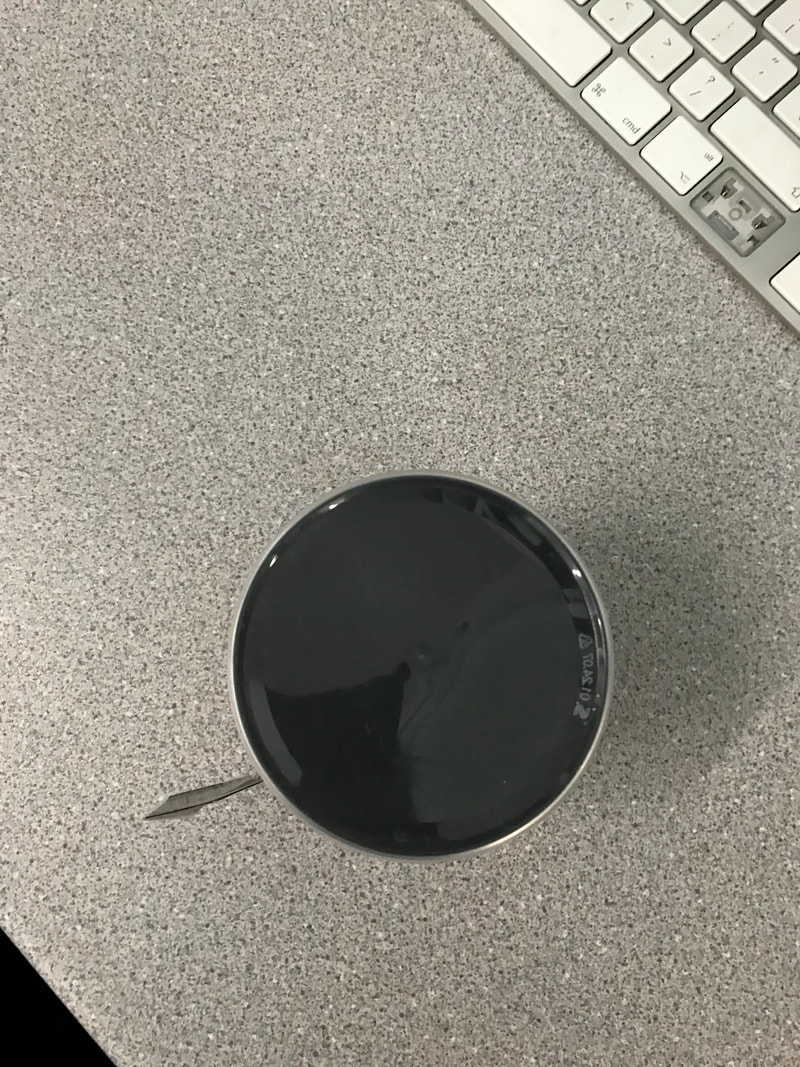
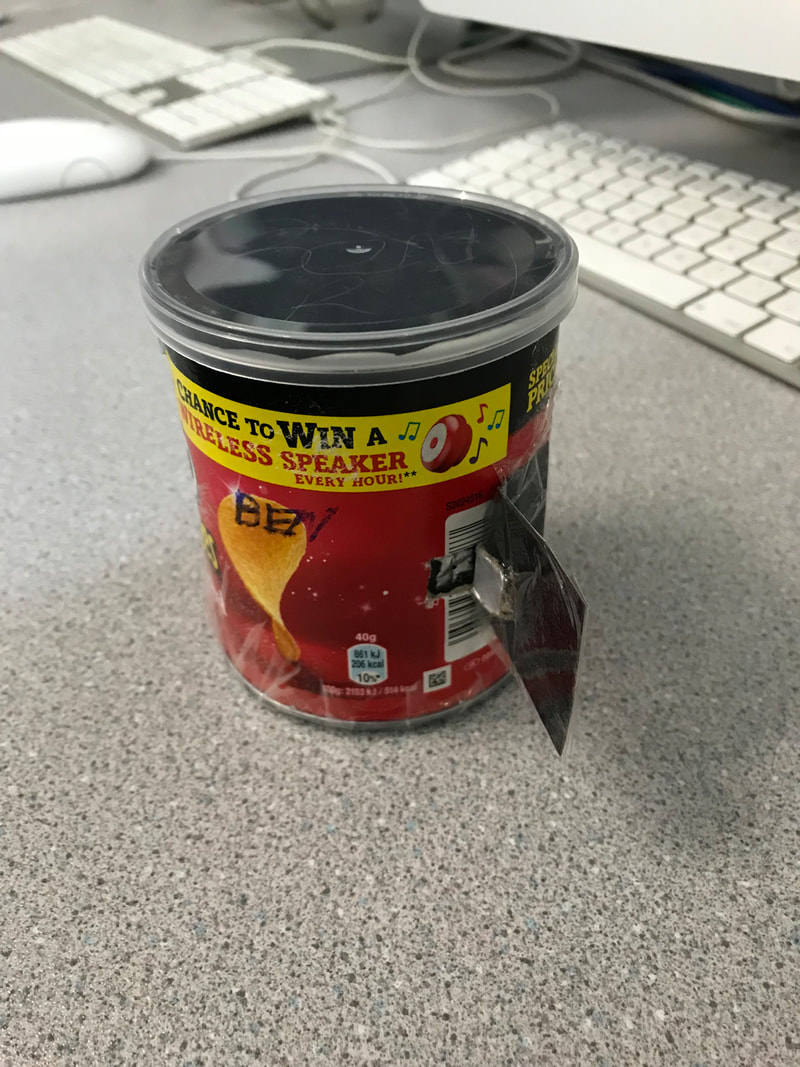
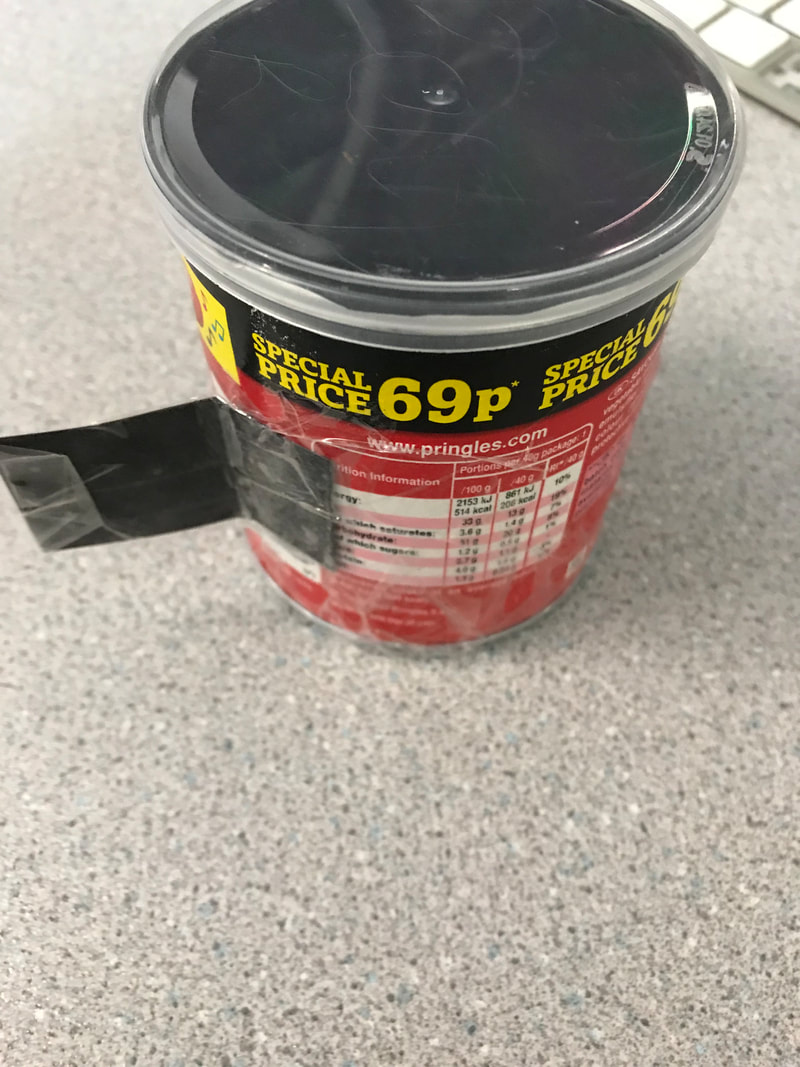
For our Pinhole camera we needed specific equipment to make it work. We needed the following :
- A Pringles cylindrical can & lid
- A roll of tin foil
- Black gaffer/duct tape
- Black card to line the inside if reflective
How to make a Pinhole camera:
1) You open your Pringles cylindrical can and remove the lid. You then cut out the right size of black card to fit inside of the can to line the inside if reflective.
2) You do this by gluing the outside of the black and sticking all around the inside of the can.
3) You then cut out a circle of black card the size of the lid and sellotape it on top of the lid so it blocks out any light being exposed into the can.
4) You then cut a square out making sure you leave the right side of the square on and hanging down the middle of the outside part of the can 10mm x 10mm.
5) Once the can is cut open, you then go through to the black card and make sure that is cut the same size as the can leaving no hanging parts, so there is a direct hold passing through the can and the black card.
6) You then cut out another small rectangle piece of black card that acts as a door to block the hole from light by sellotaping it to the right size of the can hole, then sellotape on the remaining hanging piece of the can onto the black card you just stuck on.
7) Then you cut out a piece of tinfoil and glue it onto the inside of the can in front of the hole.
8) Then using a pin, from the inside, carefully poke a small hole through the tinfoil allowing that hole to be the only light being exposed into the can.
|
|
|
Pinhole Photograms
Once we created our Pinhole camera's, we placed our photo-paper inside and put the lid on and blocked the small hole using the black card. We then needed to capture three shots from different view points :
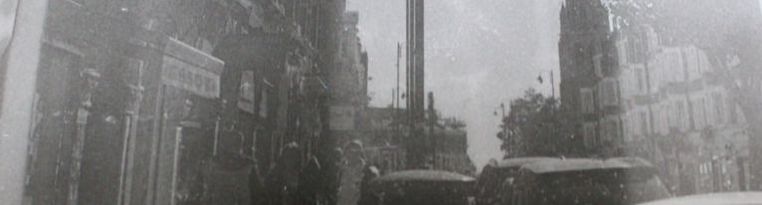
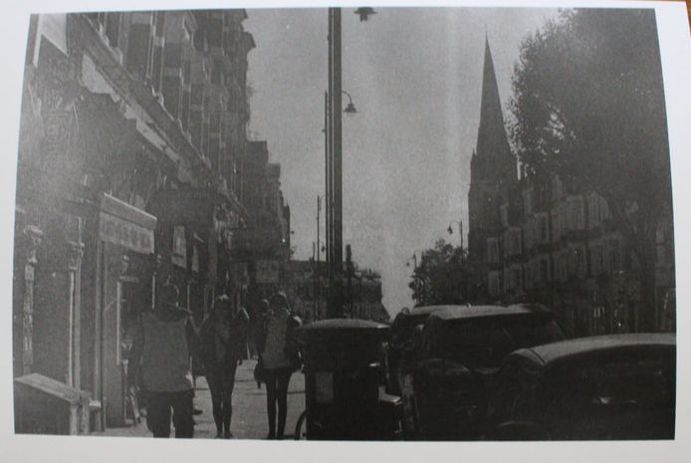
From a window looking outwards:
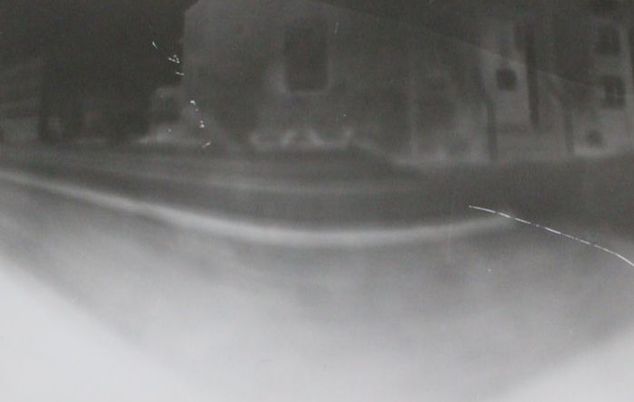
Outdoors and at the corner of a building:
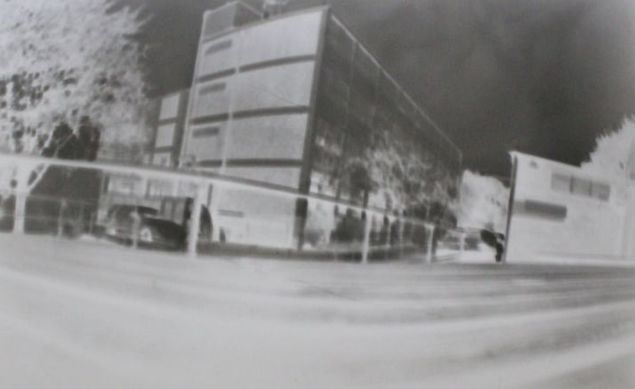
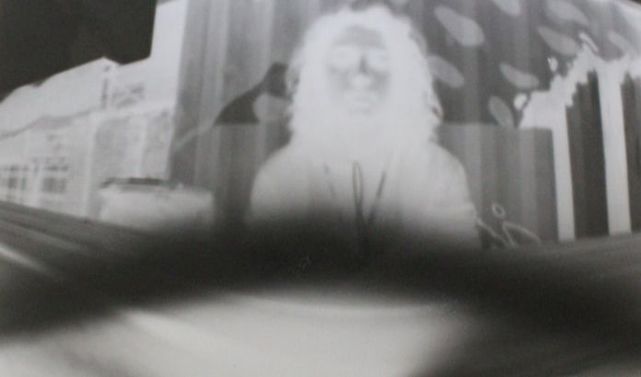
Involving a person:
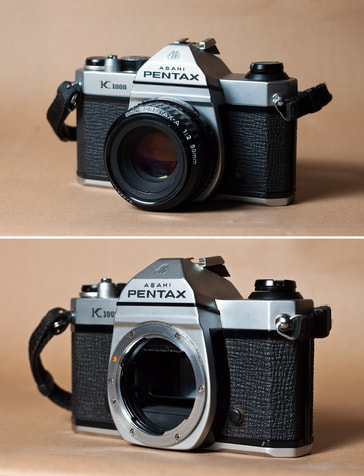
Film Camera
A film camera is such that exposes photographic film to light in order to take a picture. Used since the late 1800s, the film is a chemical emulsion on a plastic substrate that is sensitive to light. When exposed, an analogous image of the scene is created within the chemical layer of the material so film cameras are analog cameras. For this task, I went out into Muswell Hill and captured photos making sure i was using the right aperture and shutter speed depending on the lighting and how focused I wanted it to be.
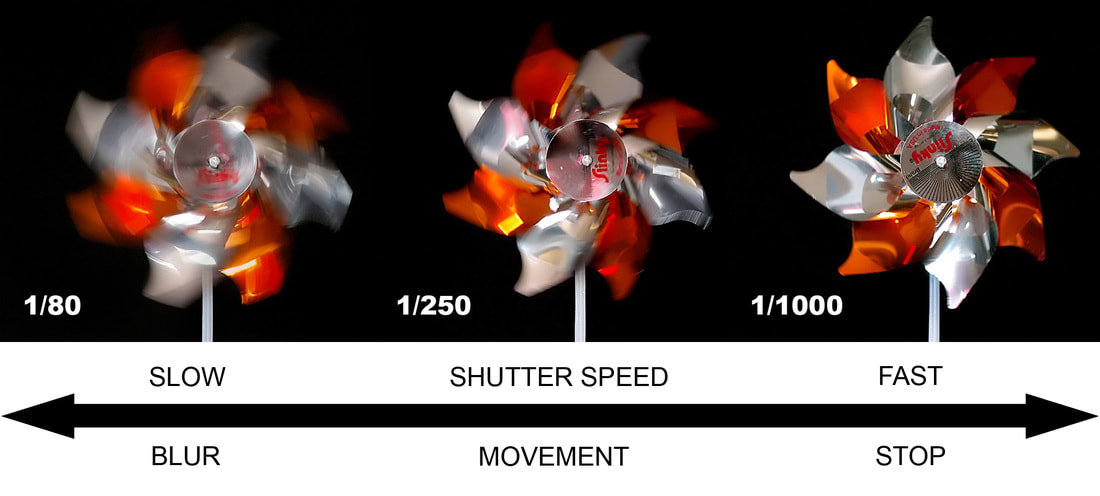
Shutter SpeedIn photography, shutter speed or exposure time is the length of time when the film or digital sensor inside the camera is exposed to light, also when a camera's shutter is open when taking a photograph. The amount of light that reaches the film or image sensor is proportional to the exposure time.
|
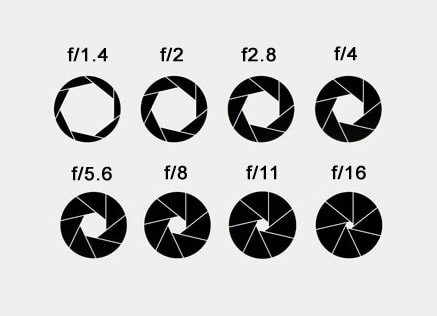
Aperture Aperture controls the brightness of the image that passes through the lens and falls on the image sensor. It is expressed as an f-number (written as “f/” followed by a number), such as f/1.4, f/2, f/2.8, f/4,f/5.6 f/8, f/11, f/16, f/22, or f/32.
|
Processing and Printing
- Start by ensuring that you have the following equipment to hand (see Fig.1):
- Developing tank/container, top and lid
- Film spool
- Spool funnel - Transfer your film to a spool in the 'Film Transfer Cupboard' in pitch black
- Once finished, turn the top part of the tank into place so the funnel is trapped and turn until you hear a click. Now, put the lid on and then turn on the light.
- Set your chemicals up in advance, ensuring that you have the right amount of film developer, stop and fix to fill the tank to the required level, which depends on the number of films. A single film spool takes 300ml of solution, but as I was working with a partner there was two films so we added 600ml of solution.
- Check the correct timings and using a timer, start the process. Remember to agitate the tank regularly (every 1 minute, turn for 10 seconds times slowly).
- The timing of the film developer will depend on the type of film being used and ISO so check very carefully or ask your teacher. I used a Kodak film which uses 400 ISO.
- Ensure this process: Film Developer (6min 30secs) > Stop (30 seconds) > Fix (5min) > Running Water (5min) > Wetting Agent ( A couple drops and gently shake your spool with your film in the remaining water in your developer tank until you see bubbles)
- Squeeze or use your hand gently to remove excess wetting agent and hang with clips at both ends in the film drier. Label with your name and current date.
- Once dry, cut up into strips of five (not six) and put into your archival sleeves. Now label with your name, date and reference i.e. location/event
- Make a contact sheet and ensure it is placed before your archived negatives for reference.
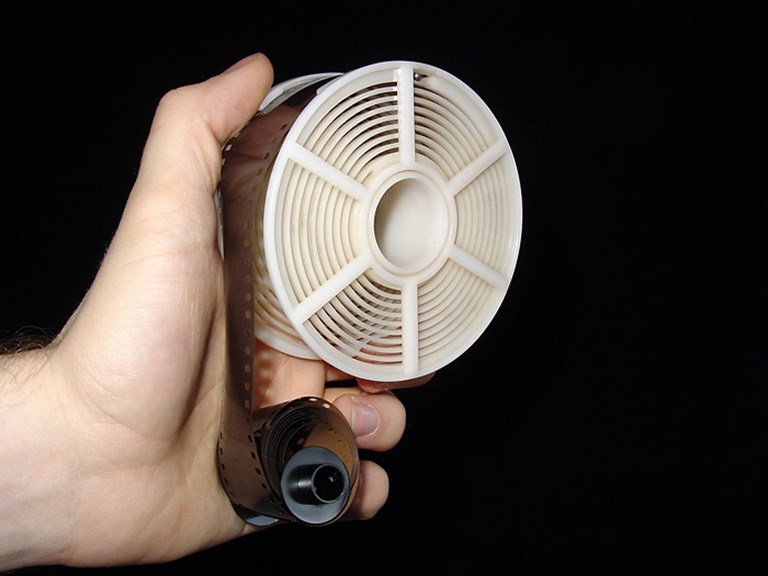
Film Spool
|
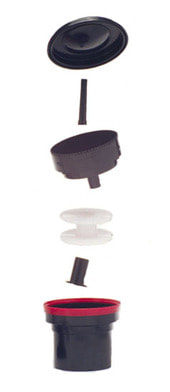
Developer Tank
|
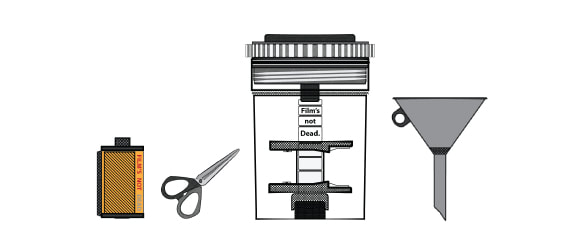
Film / Developer Tank / Spool Funnel
Contact Sheet
After processing and printing our strips, we needed to create a contact sheet with all our strips on one sheet. I did this by placing all my strips on photographic paper and putting it under an enlarger. My enlarger was set to an aperture of F8 and exposed for 10 seconds as that amount of time worked before hand when using test strips.
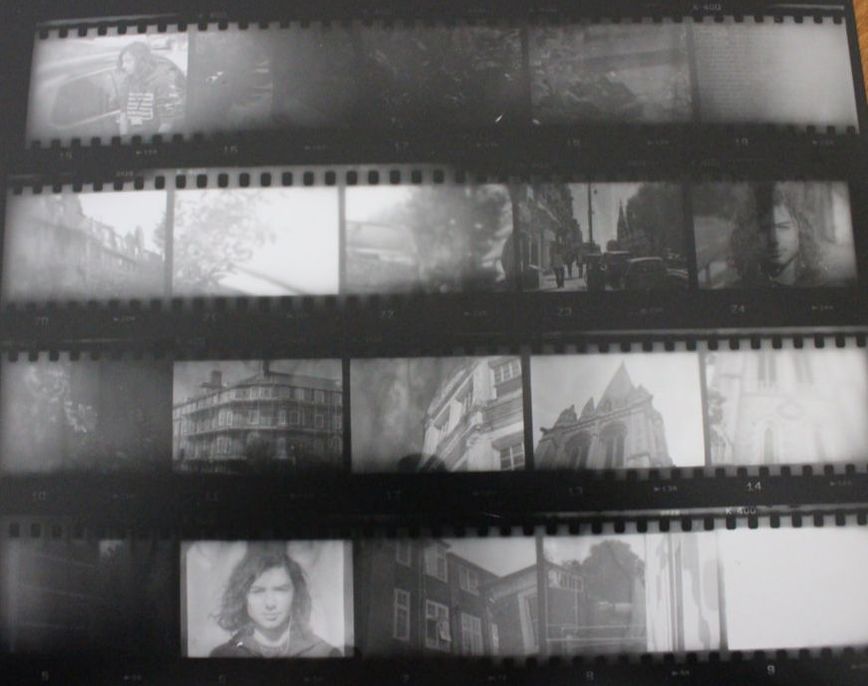
For my contact sheet I took a range of different photos with many different viewpoints, with all of them in focus but some are over and under exposed causing white or black colours to take over the picture. To fix this I need to focus more on getting the right aperture and shutter speeds to ensure my photos get the sharp black and white contrasts. There are still many in focused photos but due to how long I exposed them in the darkroom has led to unclear photos. So to fix this I need to re-expose my contact sheet using another piece of photographic paper and getting the correct exposure length. I believe I do not need to re-shoot the project but instead I need to focus on exposing the paper for the right amount of time.
Process of Enlargement
For this task, we chose one of images on our 5 strips to use for enlargement. After I chose, I placed the whole strip into a negative carrier and flipped it upside down because when the light is shone onto it, it flips it and will be facing me. I then got my easel and measured it to be 3cm horizontally and 7cm vertically so it aligns with my photographic paper. I then zoomed in and focused the image using my enlarger so it looks perfect on my photographic paper. When it was aligned right, I exposed to many different amounts of time to get it the most sharp white and black colours using an aperture of F8.
Test Strip 1
For my first test strip, I tested out 4 sections of the test strip with different amounts of exposure times. I tested out 2, 4, 6, and 8 seconds. I realised that 8 seconds was the best to get the most out of the sharp black and white colours, but I still believed I could get a stronger contrast.

F8
Test Strip 2
Following my first test strip, for my second test strip I tested out two sections of the test strip with 8 and 10 seconds of exposure. I realised that 10 seconds was the best amount of exposure to get a strong contrast.
F8
Finished piece
For my final piece, I exposed my photographic paper for 10 seconds. Using an easel, I created a border making the photo cleaner. As the photo had some finger prints and dust on it, I tried to use an air canister to get rid of most of it, but there was still some bits of it so next time to perfect the photo I need to be more careful when placing it into the negative carrier to avoid anything ruining the picture.
F8
