The History Of Photography
|
|
|
|
Photograms
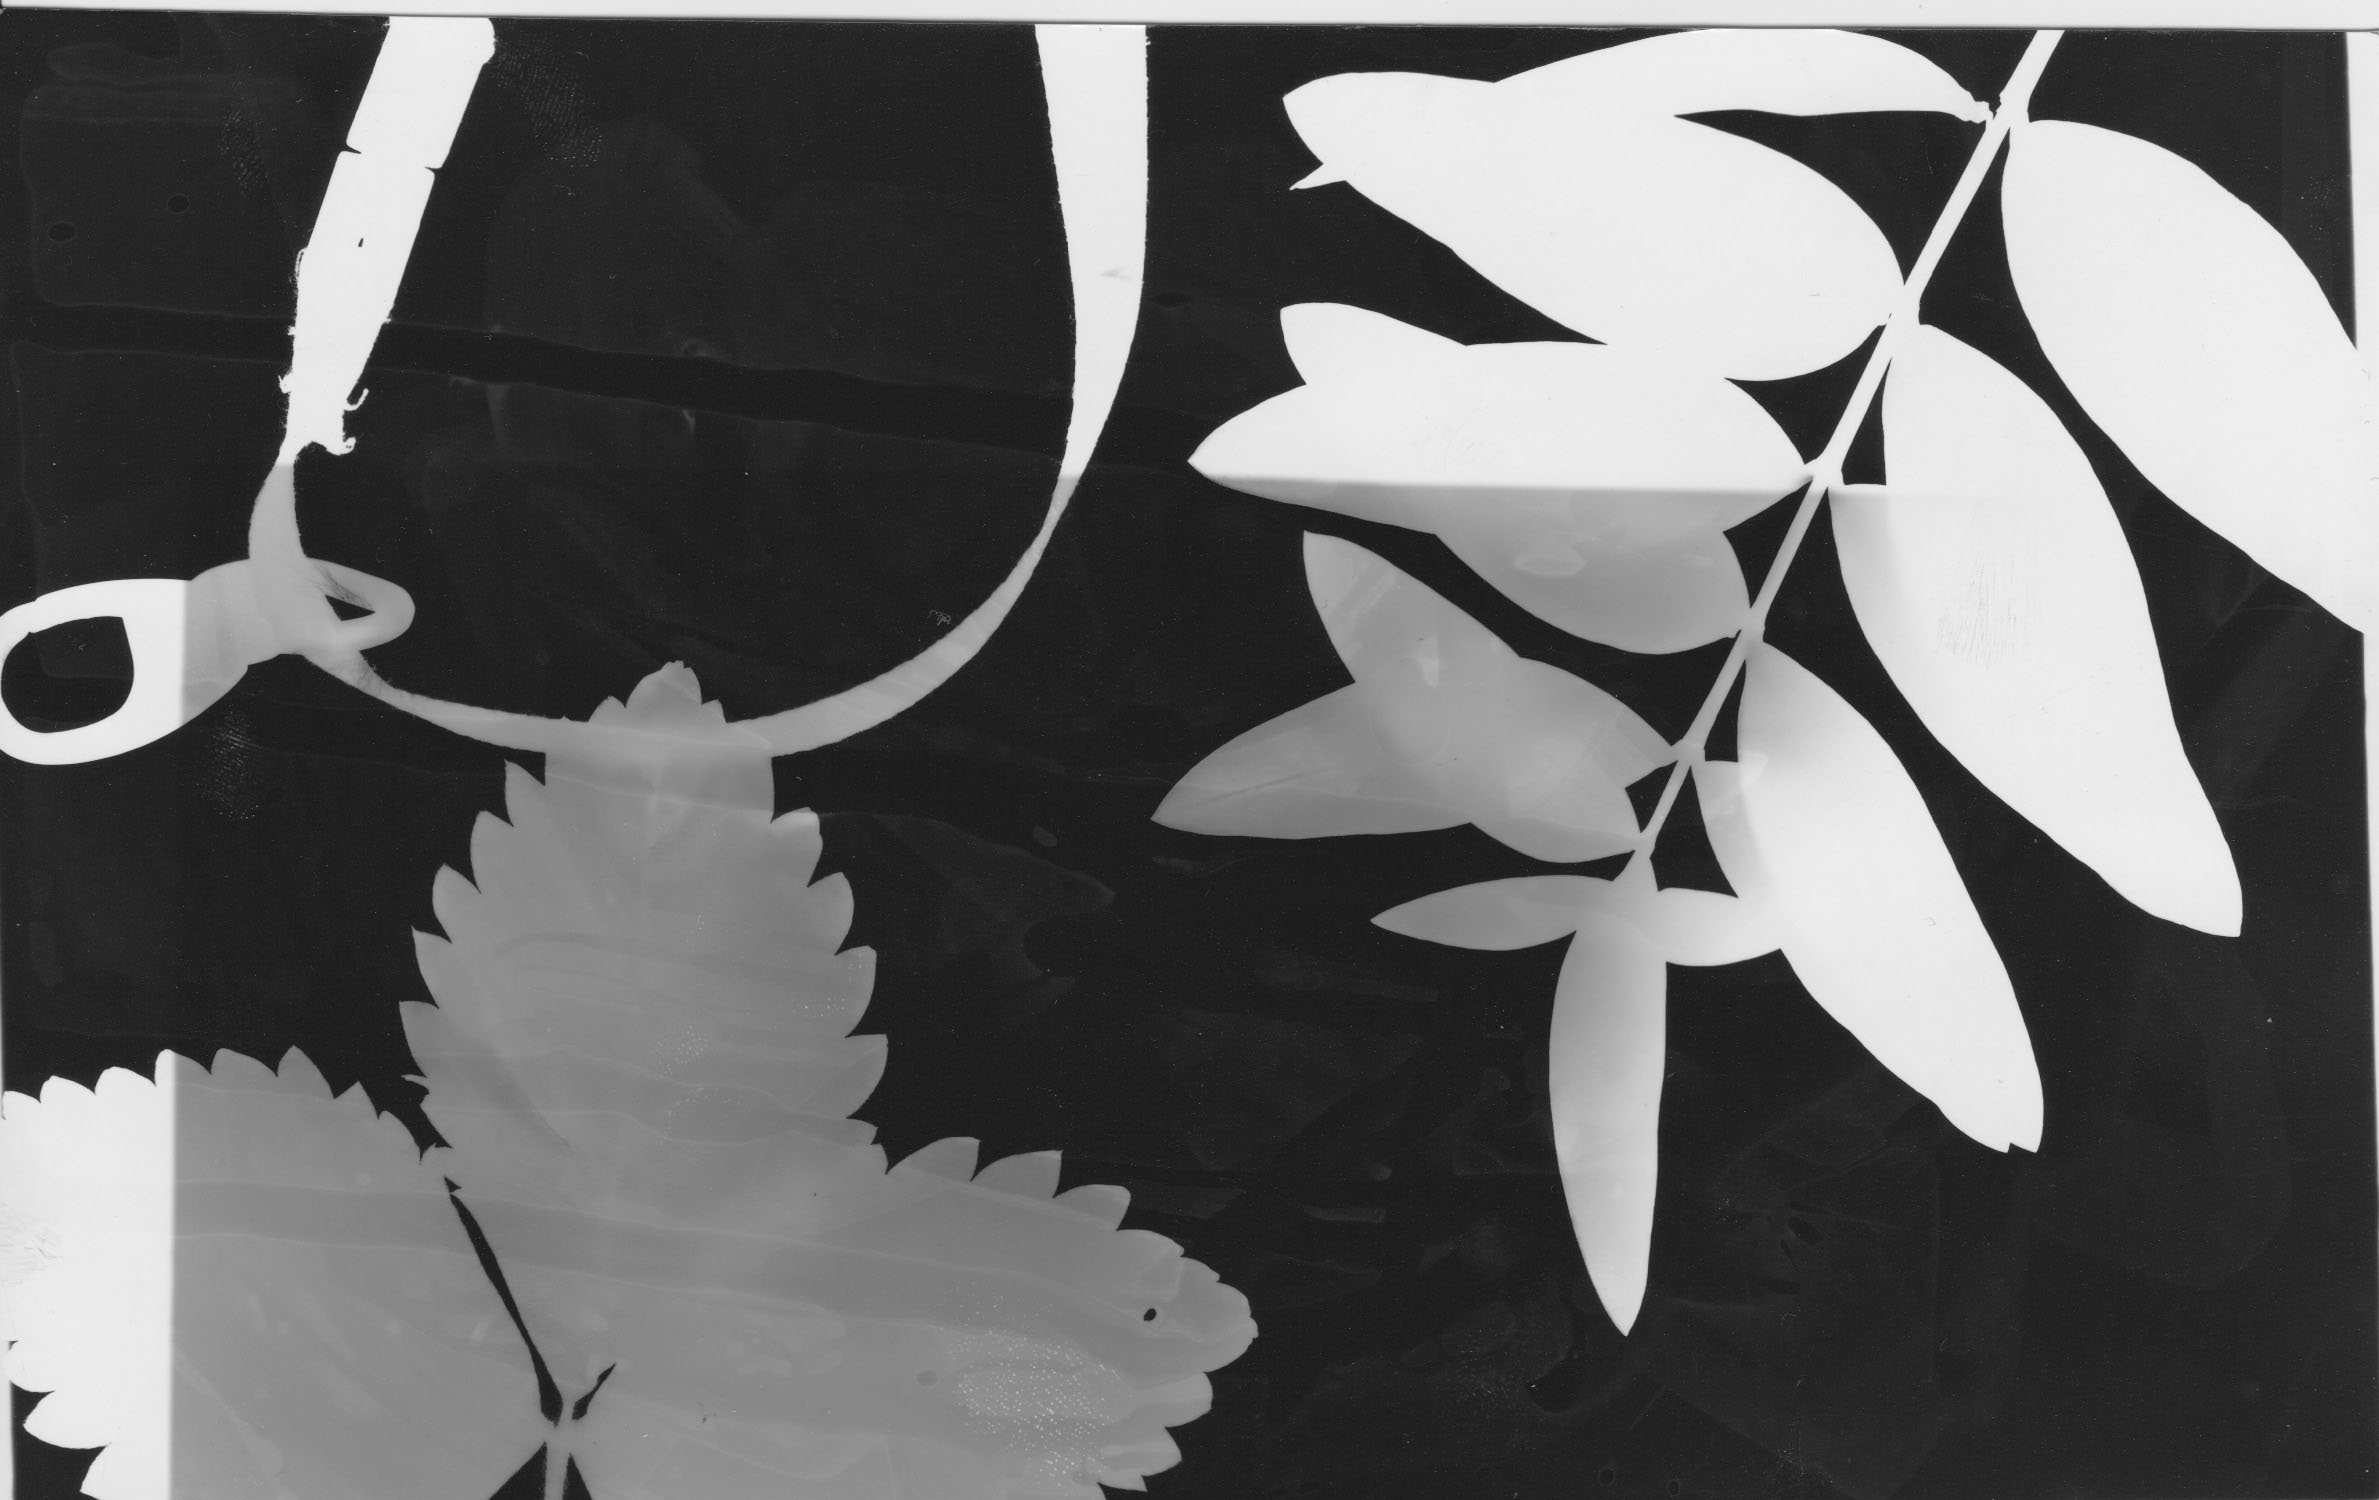
A Photogram is a photographic image made without a camera by placing objects directly onto the surface of a light-sensitive material such as photographic paper and then exposing it to light. The usual result is a shadow image that shows variations in tone that depends upon the transparency of the objects used.
How To Make A Photogram :
WWW : I managed to create a photogram after a couple attempts and learnt all the different steps and functions of how to make a photogram.
EBI : It would've been better if I was able to create a photogram on my first go and to make it as clear as possible.
How To Make A Photogram :
- You begin by setting your enlarger to shed an area of light that is slightly larger than the size of your piece of photo paper.
- Next, lay out your photo paper under the enlarger where the light will shine down.
- Then arrange your objects onto the paper in any fashion.
- Switch the enlarger on and expose the paper for approximately 3 - 5 seconds.
- Then carefully remove the objects and you're ready to develop.
- You then place your paper in the developer tray and ensure the paper is fully submerged and process for 60 seconds.
- You then take the paper out of the developer tray and allow to drip for 7 seconds and place it in the stop bath tray and ensure the paper is fully submerged and process for 30 seconds.
- You then take the paper out of the stop bath tray and allow to drip for 7 seconds and place it in the fixer tray and ensure the paper is fully submerged and process for 5 minutes.
- Finally, remove the paper from the fixer tray and allow to drip for 7 seconds and place it in the water bath and rinse the paper for 5 minutes. Then lastly let the paper dry.
WWW : I managed to create a photogram after a couple attempts and learnt all the different steps and functions of how to make a photogram.
EBI : It would've been better if I was able to create a photogram on my first go and to make it as clear as possible.
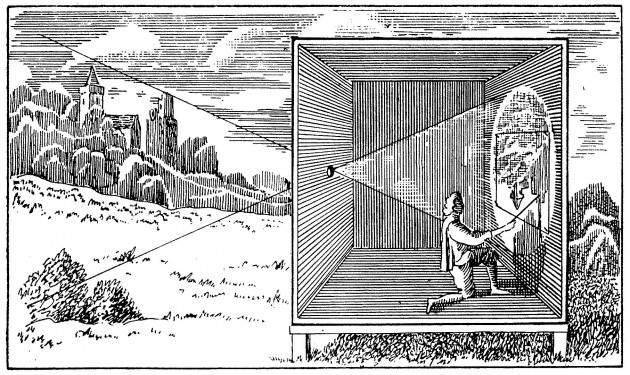
Camera Obscura
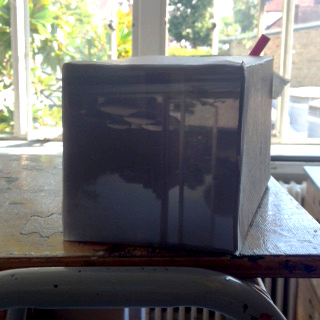
A Camera Obscura is when an image of a scene at the other side of a screen or for instance a wall is projected through a small hole in that screen as an inverted image left to right and upside down on a surface opposite to the hole. The surrounings of the projected image have to be dark for the image to be clear, meaning so many experiments were done in dark rooms.
How To Make A Camera Obscura :
WWW: I created a stable Camera Obscura and made good drawings of what I could see through the box.
EBI: If I was to have more time, I would've been able to create an even better drawing of what I could see through the box.
How To Make A Camera Obscura :
- Firstly, you get your rectangular cardboard box and on one side you cut a 1 x 1 square hole directly in the middle using a scalpel.
- On the other side of the box cut the end of the box off and then get your tracing paper.
- After the tracing paper is taped onto the box, you then get your magnifying glass and tape that onto the 1 x 1 hold we cut out.
- Finally, stay in a shaded area and point your camera obscura to the light and you should recieve an inverted image.
WWW: I created a stable Camera Obscura and made good drawings of what I could see through the box.
EBI: If I was to have more time, I would've been able to create an even better drawing of what I could see through the box.
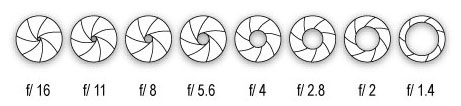
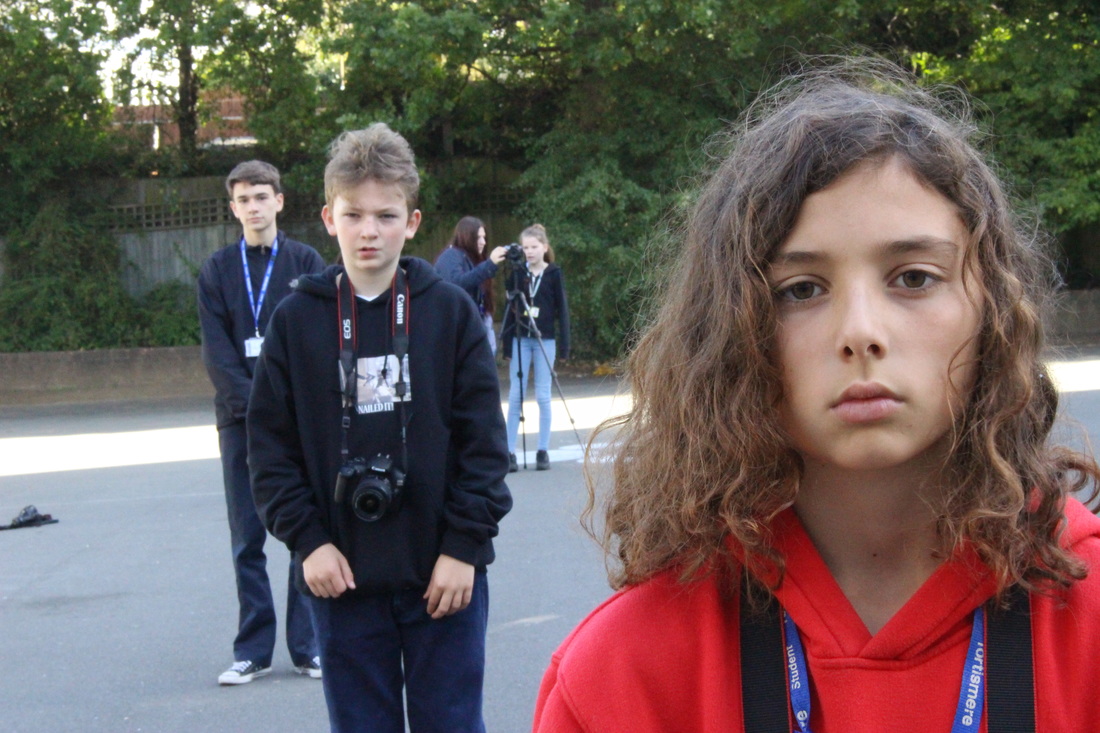
Aperture
 F/5.6, 1/80, ISO 320
Aperture means the opening of a lens' diaphragm through which light passes. It is calibrated in f/stops and is generally written as numbers like 1.4, 2, 2.8, 4, 5.6, 8, 11 and 16. The lower the f/stop, the more exposure given because they represent larger apertures whereas the higher the f/stop, the less exposure given because they represent smaller apertures.
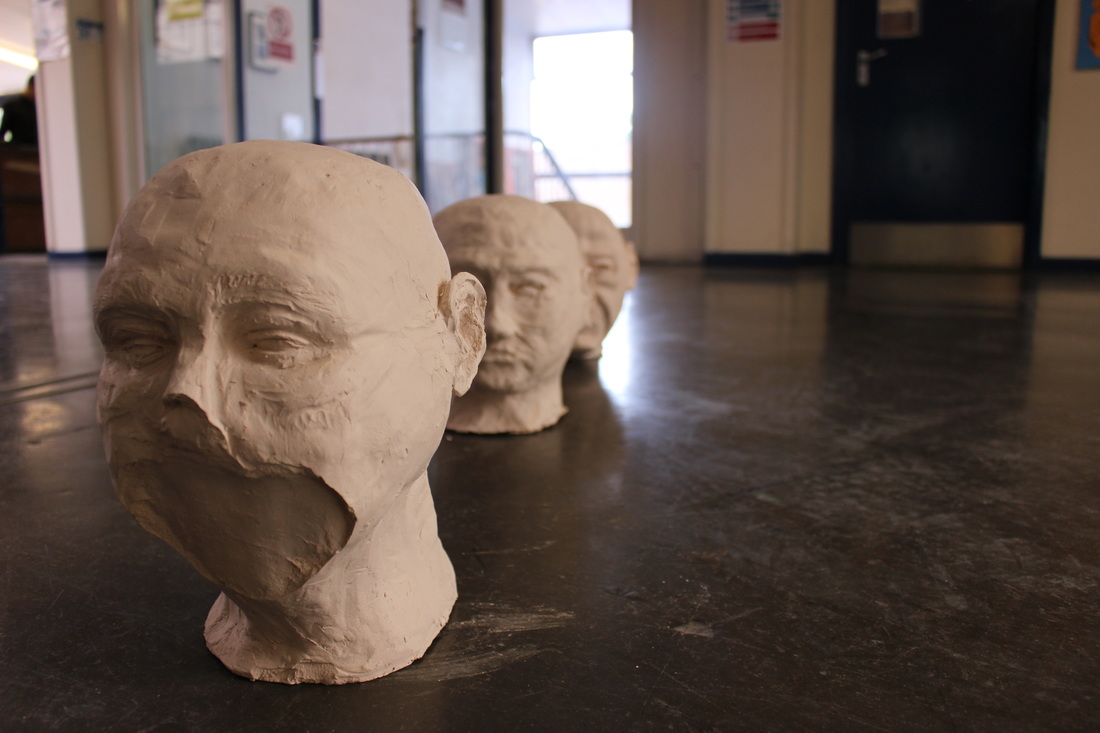
 F/10.0, 1/100, ISO 1000
How To Use Different Apertures
To use different Apertures you first have to change your digital camera to Av mode (Aperture Priority AE). If you were to start off with a wide aperture meaning a low f/stop (so a number like f/1.8), this would give the picture a shallow depth of field causing what's been focused in the picture to be sharp and leaving farther parts of the scene to be blurry. If you wanted to have everything in focus you would have a narrow aperture meaning a higher f/stop (so a number like f/22). This means that the depth of field will become much greater causing all light that comes in to have a sharp focus.
To use different Apertures you first have to change your digital camera to Av mode (Aperture Priority AE). If you were to start off with a wide aperture meaning a low f/stop (so a number like f/1.8), this would give the picture a shallow depth of field causing what's been focused in the picture to be sharp and leaving farther parts of the scene to be blurry. If you wanted to have everything in focus you would have a narrow aperture meaning a higher f/stop (so a number like f/22). This means that the depth of field will become much greater causing all light that comes in to have a sharp focus.
|
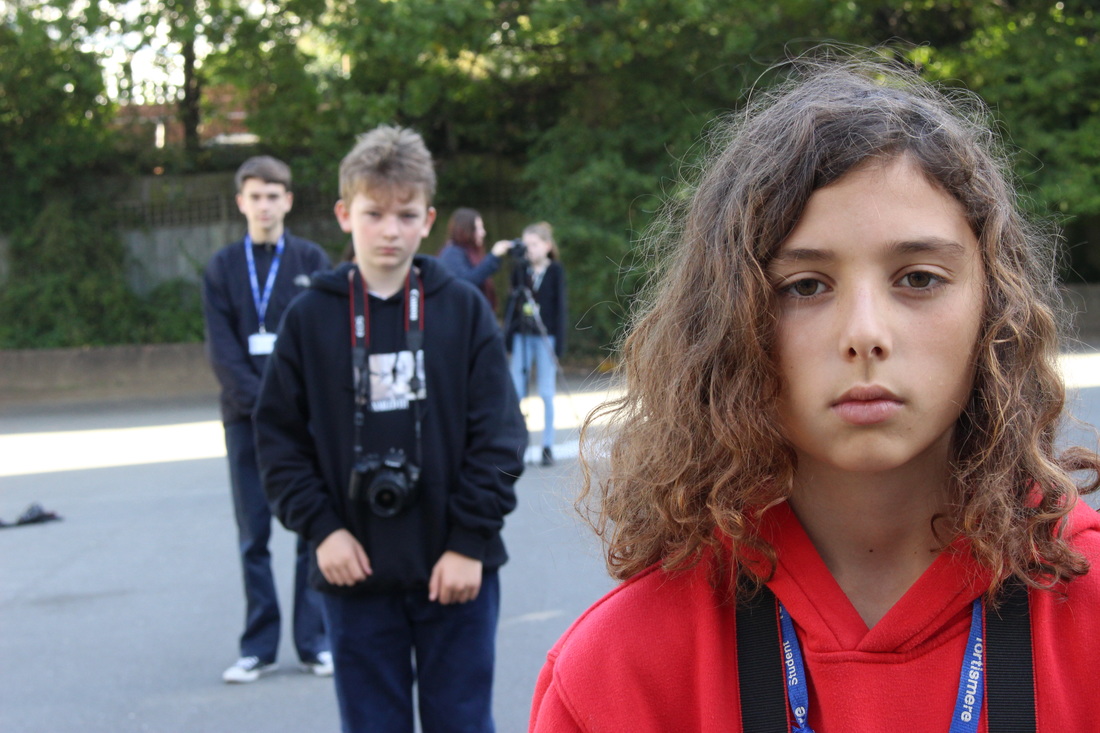
WWW: I created 3 different photos with 3 different apertures showing the difference in the depth of field when changing the f/stop.
EBI: It would've been more effecive if everyone did the exact same pose for each picture and to have the people in the background not in the shot. |
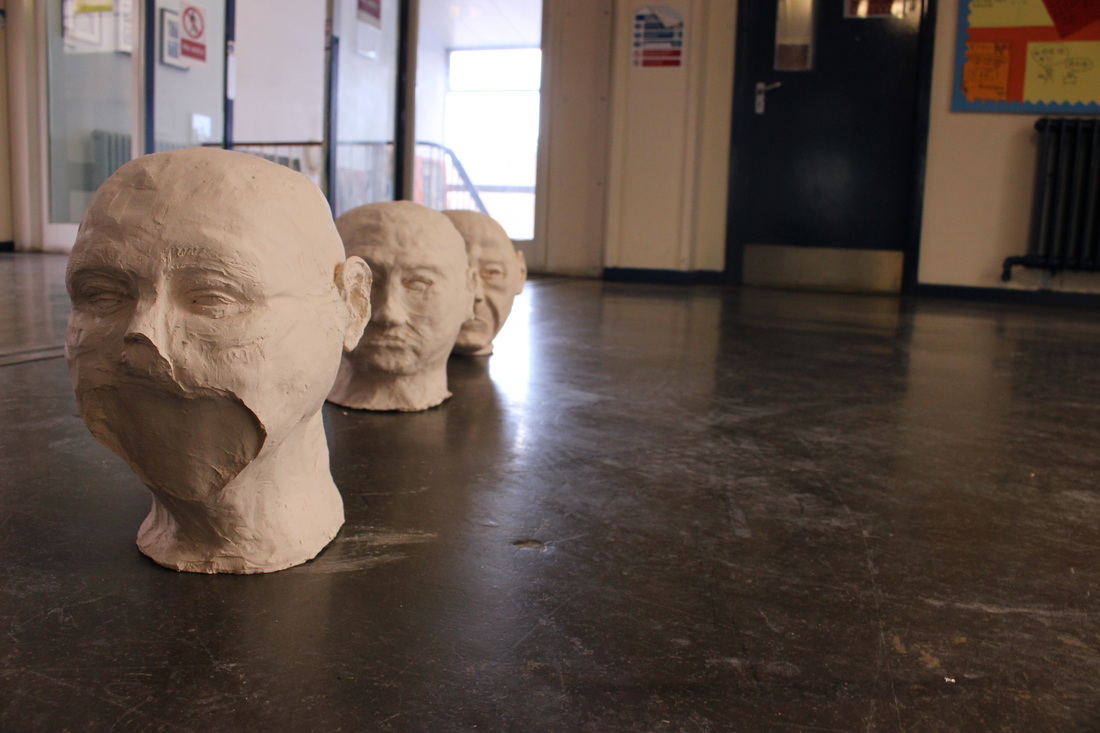
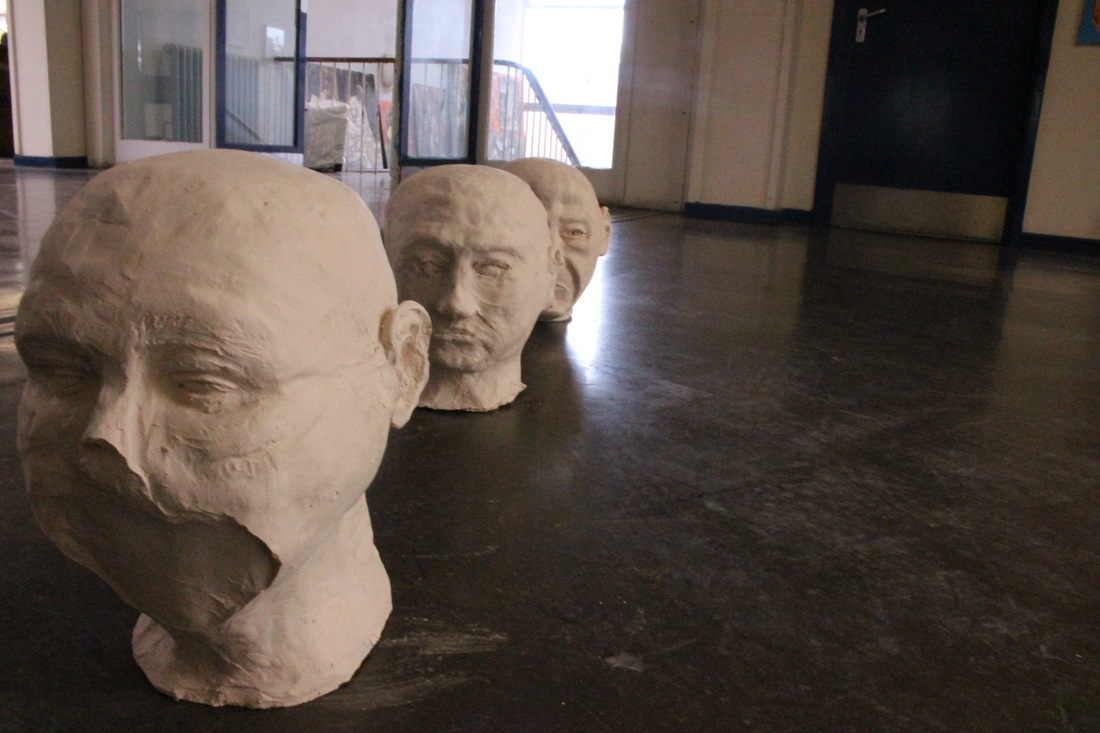
 F/22.0, 1/100, ISO 5000 F/22.0, 1/100, ISO 5000
|
F/3.5, 1/40, ISO 400
|
F/7.1, 1/30, ISO 400
|
F/22, 1/25, ISO 400
|
F/13.0, 1/10, ISO 100
|
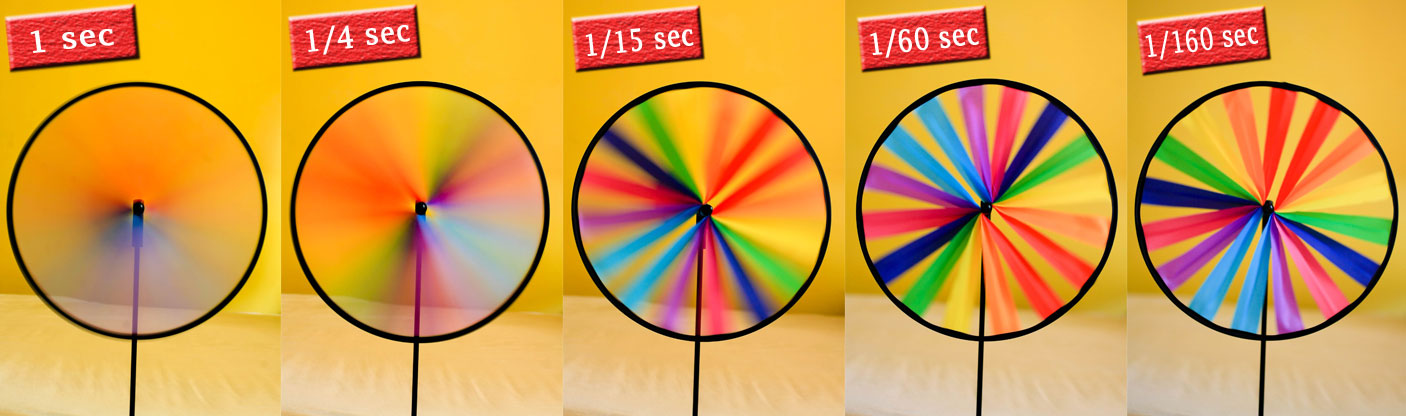
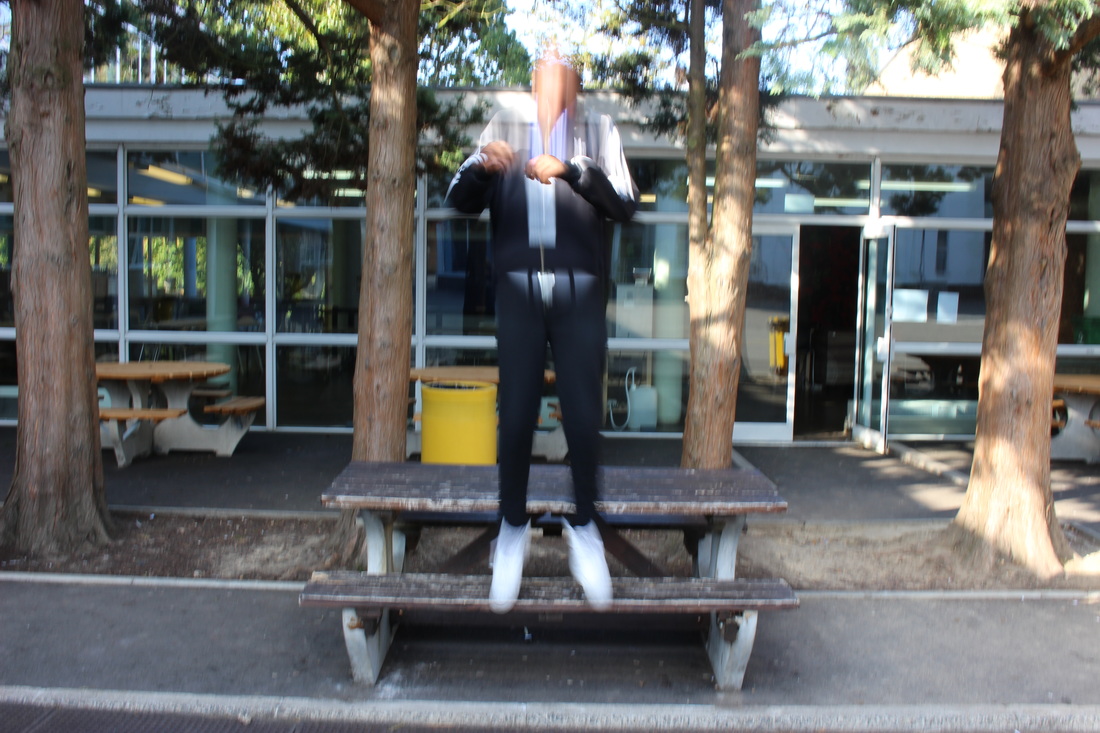
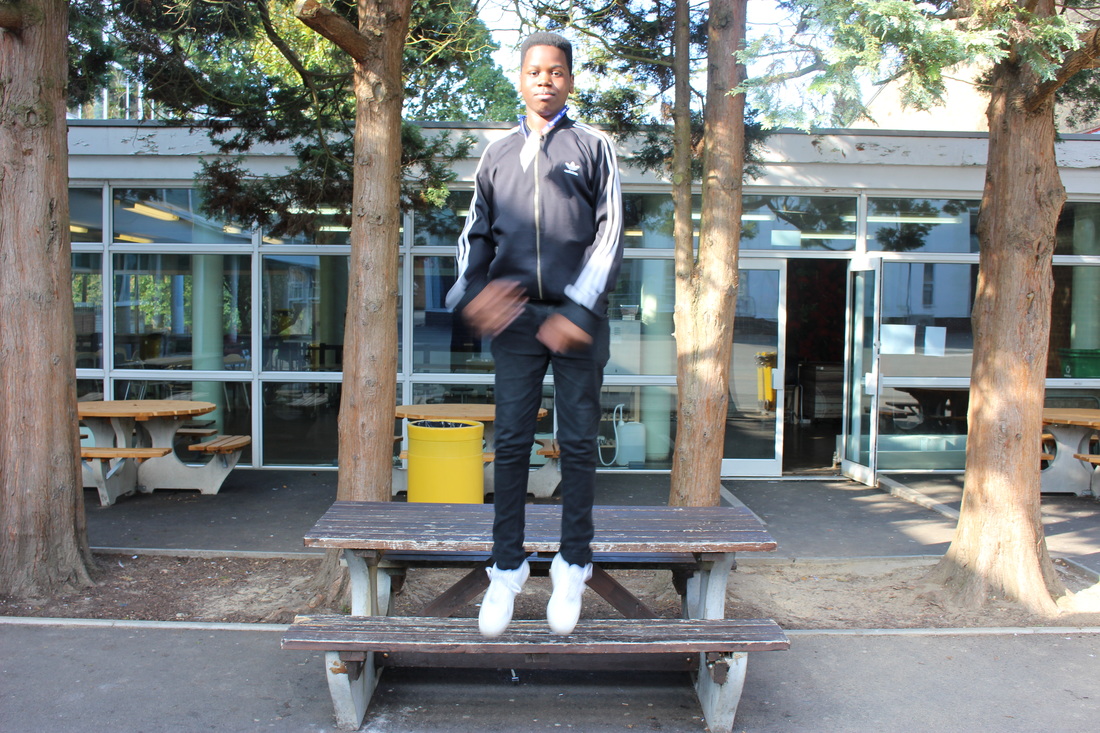
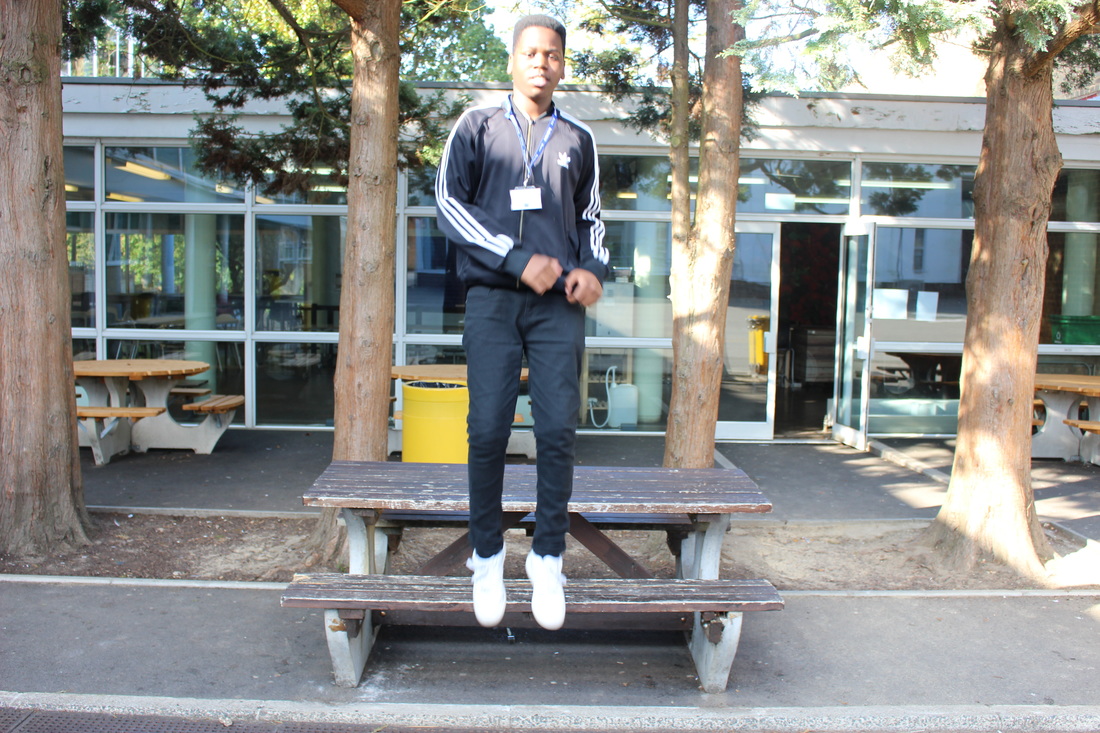
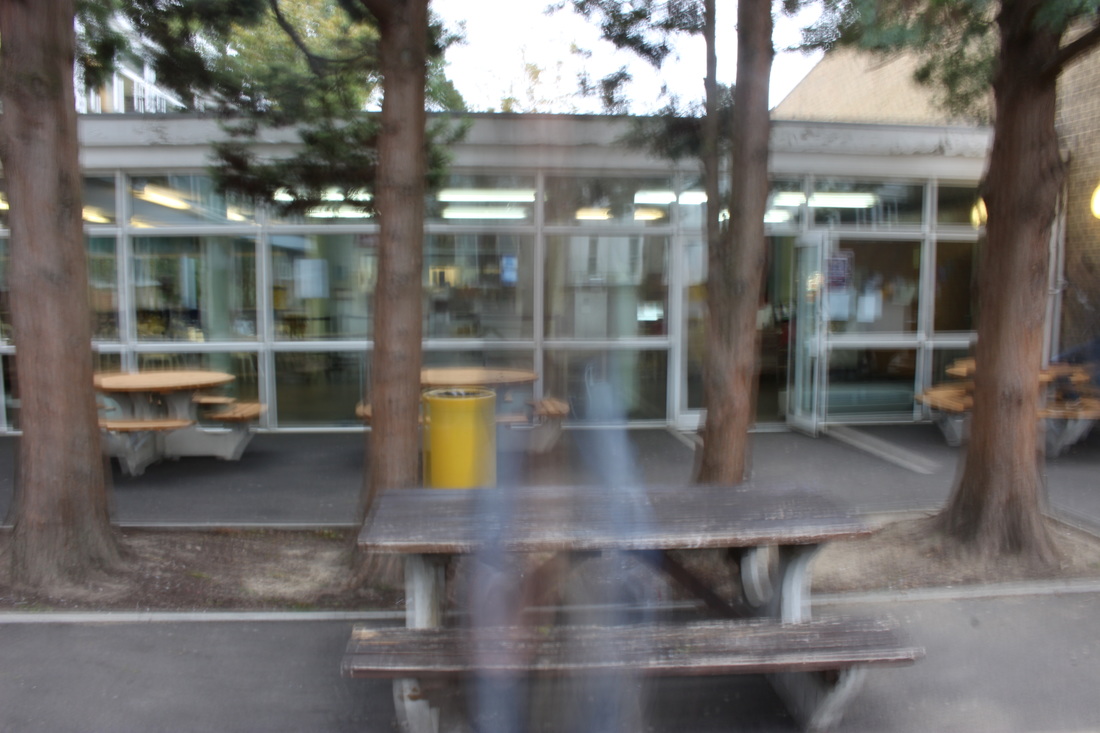
Shutter Speed
Shutter speed is the length of time a camera shutter is open to expose light into the camera sensor. If the shutter speed is fast it creates a much sharper photo and helps to freeze action completely. If the shutter speed is slow, it can create and effect called motion blur where moving objects appear blurred along the direction of the motion. |
F/7.1, 1/30, ISO 100
|
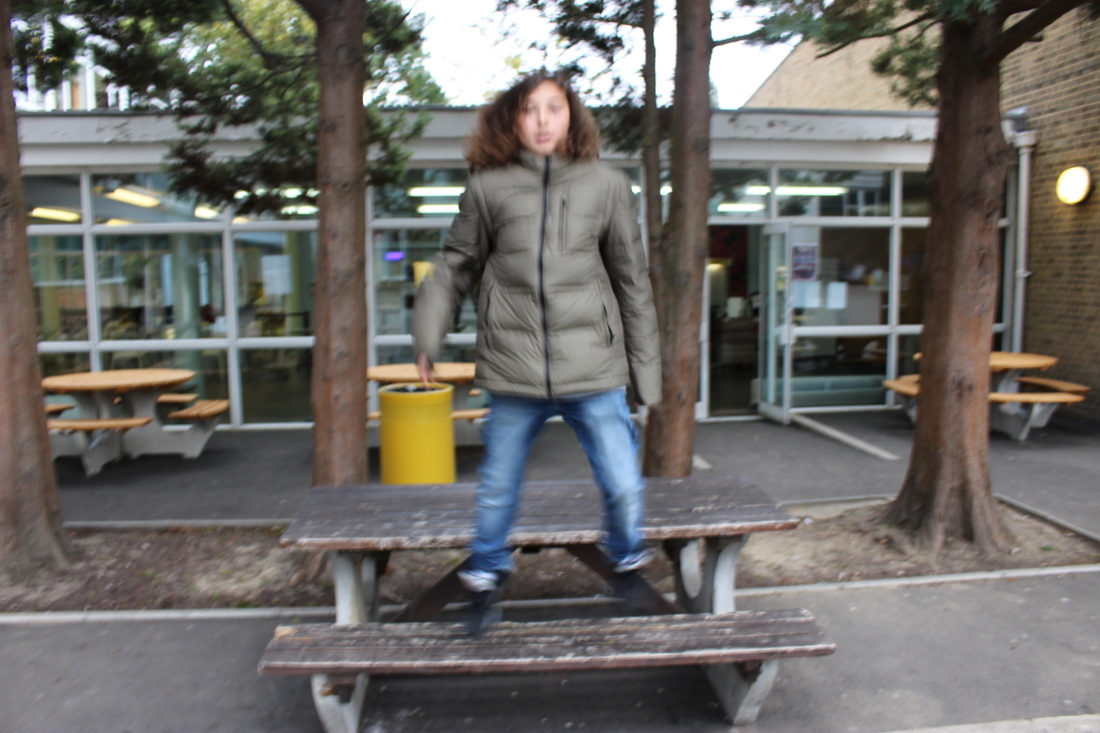
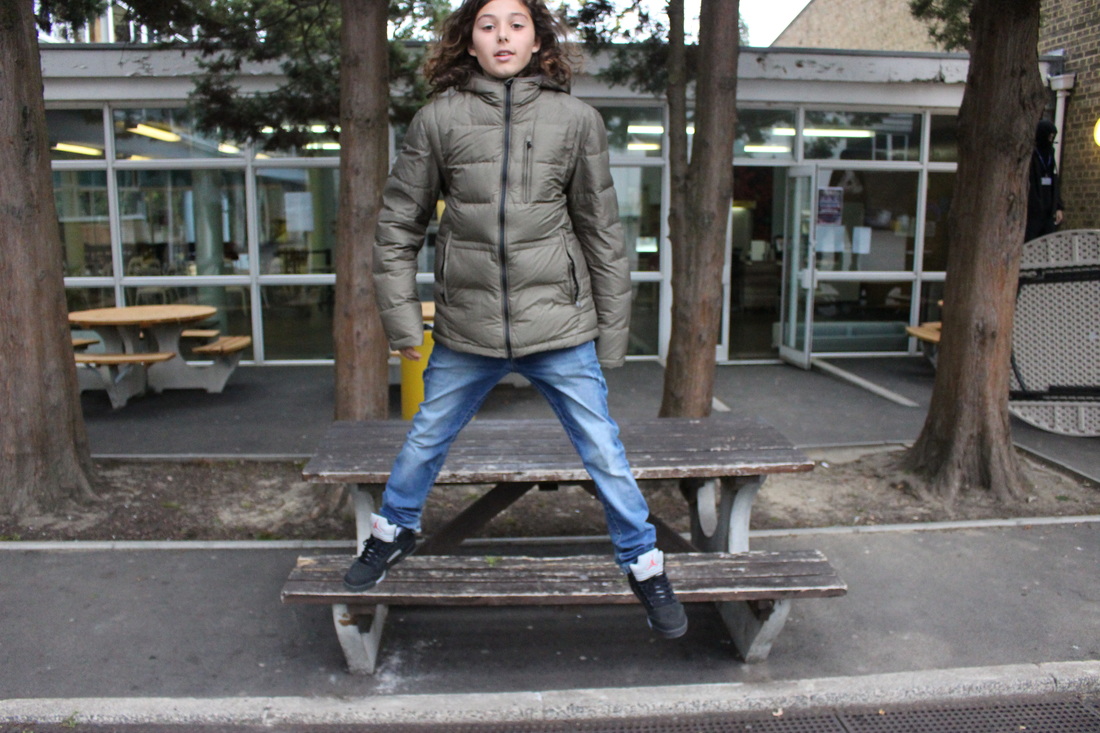
How to Use different Shutter Speeds
To use different Shutter speeds you first need to change your digital camera to Tv mode (Shutter Priority AE). You then change your ISO depending on how bright it is (in this instance it's ISO 100). After that, if you wanted to start with a blurred picture, you would change your shutter speed to a lower number, for example 1/10. You then raise the shutter speed number higher and higher depending on how sharp you want the image to be. Starting at 1/10 and slowly increasing your shutter speed to 1/30 then 1/80 will change your blurry moving image into a much clear/sharper image. |
F/4.0, 1/80, ISO 100
|
WWW: I managed to create 3 images using 3 different shutter speeds creating 3 different blurry to sharp images. EBI: It would've been more effective if I managed to use more of a wider range of shutter speeds,for example start at 1/10, then use 1/100 then end with 1/300. |
F/16.0, 1.0, ISO 100
|
F/4.0, 1/25, ISO 100
|
F/3.5, 1/1000, ISO 3200
|
Philippe Halsman
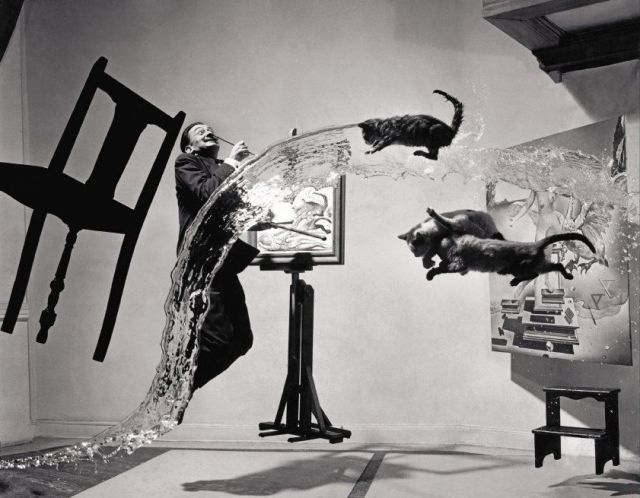
Philippe Halsman was an american portrait photographer who was born in Riga in the part of the Russian Empire which later became Latvia, and died in New York City. Philippe Halsman was known for the famous portrait, which features:
|
